 2016 – Part 2")
This is the second part in a series that focuses on IPAM. With things configured in previous post, it’s time for us to use IPAM database for the IP addresses we intend to store.
One of the interesting behaviors of IPAM that gets people a little confused when they first start using it, has to do with what kind of information IPAM will actually grab from individual databases, like DNS, and DHCP. The job of the IPAM server is not necessarily to grab addresses. It is preferable to configure them in IPAM, and then for IPAM to go about synchronizing them with the other services. So, kind of the mission of IPAM is more of a push approach towards pushing out the address information out to the different services, DHCP and DNS in the environment.
First in the list that we will look at is IP Address Blocks and Ranges
IP Address Blocks / Ranges
In IPAM, an IP address block is the highest organizational level you can use to group your address ranges. I may say, okay we are going to use 192.168.x.x private IP address space and that is the block and what we can do is to subnet up that block into individual networks which we can allocate to branch offices. IP address blocks contain IP address ranges that can be sorted into logical chunks (all private addresses in one block, all public addresses in another, for example) to help you easily manage and maintain your IP environment.
IP Address Range
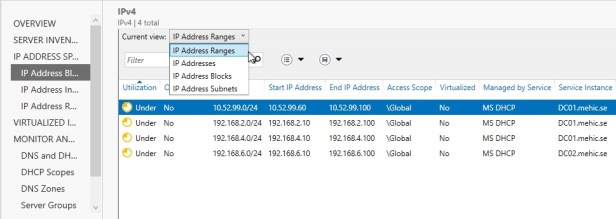
Subnet is basically associated with a range. Range is a contiguous group of IP addresses within a block. We can define a range as a subnet within a block. The IP Address Ranges are typically broken down by where the IP addresses are managed and we can see that if we go to IP Address Blocks node and change current view to IP Address Ranges. So an IP Address Range could, for example, be a DHCP Scope. You can see there are 4 different DHCP Scopes that I have brought in onto this IPAM server from the DHCP servers. They can be static addresses, or what this refers to as IPAM Managed Addresses, but they’re essentially a set of addresses that are managed via some particular mechanism. Multiple ranges then consolidate together into an IP Address Block if you need to, and that provides you with that total scope of the addresses that you intend on managing.
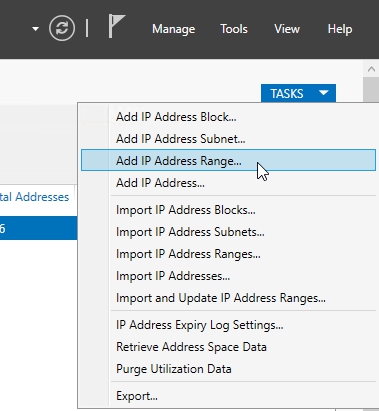
So let’s see how we can create blocks and ranges. The process of creating an IP Address Block starts by clicking on the TASKS button, and choosing to add an IP Address Block.

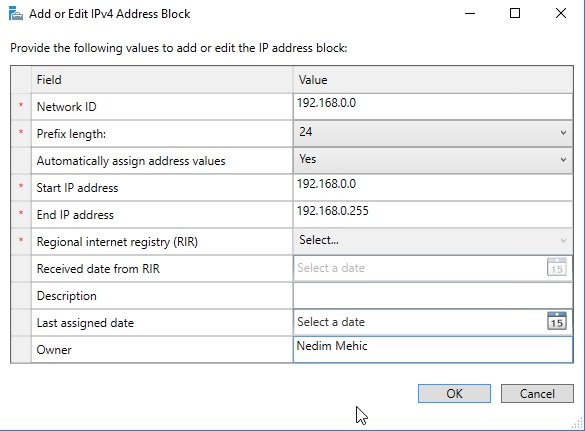
Let’s assume that we want to add in the entirety of the 192.168.0.0 network, and when we do so, we’ll put in a 24-bit subnet mask. In this Address Block I’ll allow IPAM to automatically assign address values for people that are requesting additional addresses in this block, and then under the Regional Internet Registry (RIR), (this is where we can determine which regional internet registry these addresses may come from), in a private world, with a 192.168 net address, you’re not going to find any regional internet registries that correspond to the addresses, because these are private addresses, but if I used some other address scheme, like a 128.240, then I can choose which of the available regional internet registries I’ve gotten these addresses from. Last options are description value, when the last assigned date is, who the owner is, so who owns the block, who is responsible for it. Once done click OK
Once we have done that, we’ll see that the IP Address Block now appears in IP Address Blocks list.

With the block now configured, we can now go about creating an IP Address Range and associating that with a particular delivery system, so who is going to manage the addresses in this range. We can create new range by clicking on Tasks –> Add IP Address Range
We’ll choose again the 192.168.0.0 net with a 24-bit subnet mask. I will check Automatically create IP address subnet box so this is the subnet object here in IPAM as well. (I will separate this window in small parts so that I can explain different options we have here)

What I’m doing here is effectively creating a large open space of addresses that is going to be managed by the IPAM service. This is going to be different than the types of addresses that would be managed through some other DHCP service. This is different from addresses that might be managed from Virtual Machine Manager. If I have an IP pool in Virtual Machine Manager, I can allow Virtual Machine Manager to manage those addresses on behalf of IPAM.
Here, all we’re looking to do is take this server net, this 0 server net and allow those static addresses to be managed, and just controlled by IPAM.
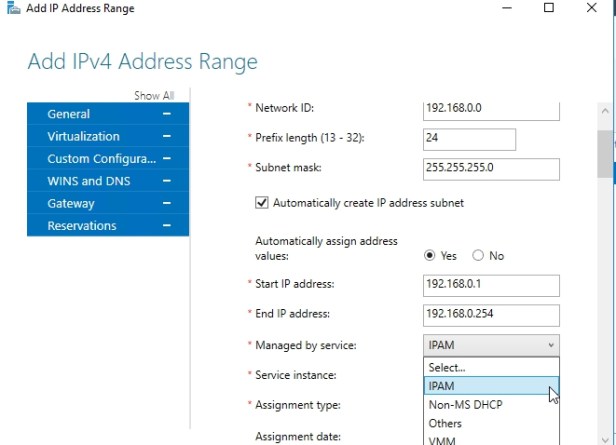
So, I’ll choose IPAM as the service that these addresses are being controlled by. We’ll use the IPAM service on the local machine, or localhost. These are static addresses as opposed to dynamic, or virtual IP, or reserved addresses. I can choose a date if I want, and then I can choose what the utilization calculation will be.

We’ll talk a little bit more about that utilization calculation, but effectively, what this utilization calculation is, it gives us nice little graphic to let us know if our address space is being properly used or not, if it’s under-utilized, or over-utilized.
If we continue to scroll down, we can see additional information, If this is a VMM managed space, and if I’ve got VMMs network virtualization components in place, I can enable network virtualization. For most of use these days, you’re probably not going to check this box. Any custom configurations you want to add here, there are a variety of custom configurations you can add, just to provide additional detail about the addresses that are part of this range. So, Active Directory Site, for example, Country or Region, the State, the Server Role, and so on.

For WINS and DNS, I might want to put up WINS and DNS servers as well, 192, 192.168.0.20 as my DNS server, and then my DNS suffix searches as well, suffix search order mehic.se.

Scrolling down a bit further, we can add connection-specific DNS suffixes, or WINS servers, any Gateway which is 192.168.0.1 in my case,

You see here, more or less what we’re entering in is the information that we want to ensure is preserved in the spreadsheet for the addresses that we’re going to later then provision out of this range that we’re creating. If I want to do reservations, or if I have virtual IP addresses down here at the bottom, I could enter these in here as well. Once done, click ok

To see our new range switch current view to IP Address Ranges and there it is. So, you can see now that we’ve created an IP Address Range here, there’s our IP Address Range, the forth one that is now managed by IPAM, as opposed to managed from Microsoft DHCP.
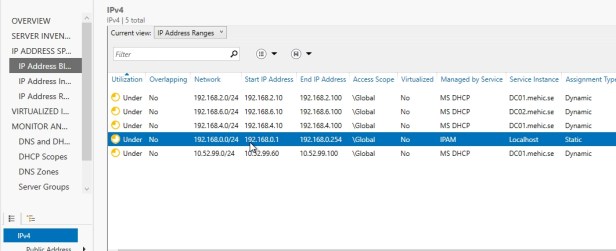
We’ve also created the subnet that is associated with the 192.168.0.0 network. This is the structure, the container into which we’ll add our IPv4 addresses.

IPAM IP Address
When you are managing an individual IP address and when go and create IP using IPAM you can go and specify the particular properties of the specific IP address. The traditional way or process with DHCP is, you have MAC address which you put in and associate it with an ip address. Next you go to DNS server and put in the name, associate it with an IP address, maybe create an reverse pointer record. The cool thing about IPAM is that we can do this from one pane of glass.
Click on TASKS and Add IP Address

I’m going to add an IP address, and you’ll see that what we’re doing now is adding this into the database so that the address can then be managed by IPAM, and a little bit later on, as you’ll see, once I add it here into IPAM, IPAM can actually synchronize, for example, a DHCP reservation for this address, or synchronize with its DNS record over on DNS server. So again, we’re not so interested in pulling information from DNS, we’re interested in pushing information for the addresses that we are managing here with IPAM.
So the IP address is 10.52.99.60 and I need to add MAC address as well which we can get by running powershell and typing nbtstat -a 10.52.99.60
We want to make sure it’s managed by IPAM, the Localhost instance. This is a host as opposed to being some network device out on the network. The address is In-Use, and it’s Dynamic. I can put in there an assignment date, and also an expiry date for this address.

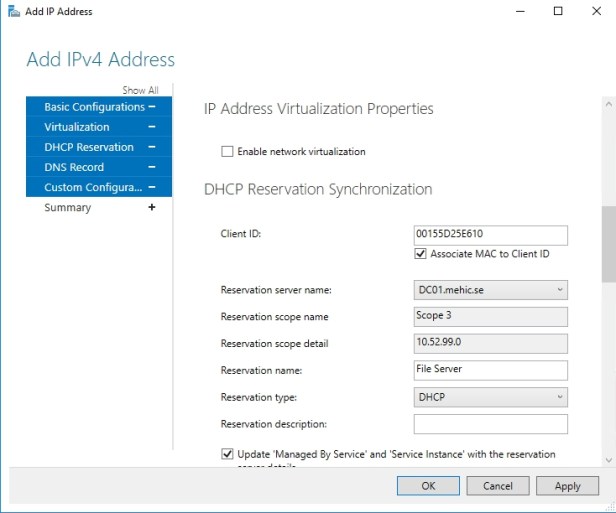
If we scroll down we can enable network virtualization and we can add DHCP Reservation if we want to.
Next thing we can do is to configure DNS Record for this. The neat part here is this little checkbox that says automatically create DNS records for this IP address. What I’m doing is allowing my IPAM server to actually make changes if I end up modifying things here, the configurations that are associated with the record. So, I just love the fact that I can do this all from one single pane of glass.

Here we can configure any further custom configurations if needed, and then click OK

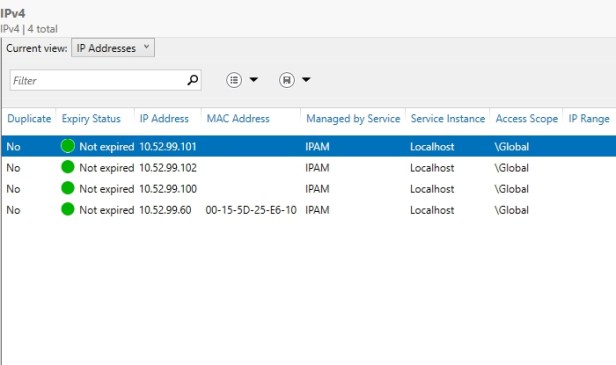
And here it is. Now if I take a look at the IP addresses here, we can see that we have one IP address that is not expired, and further, all the information, the MAC address, who it’s managed by and so on. So you can see here relatively quickly that this solution provides quite a bit more automation.

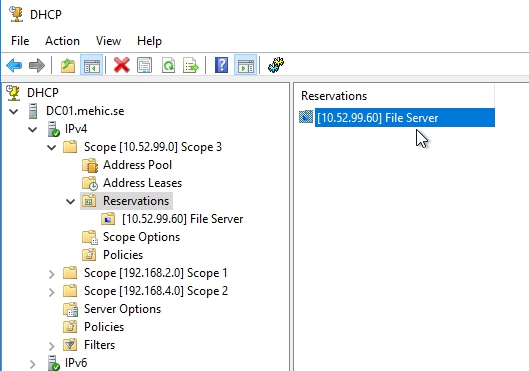
To verify, we can click on DNS and DHCP servers and right click on our DHCP server and choose Launch MMC
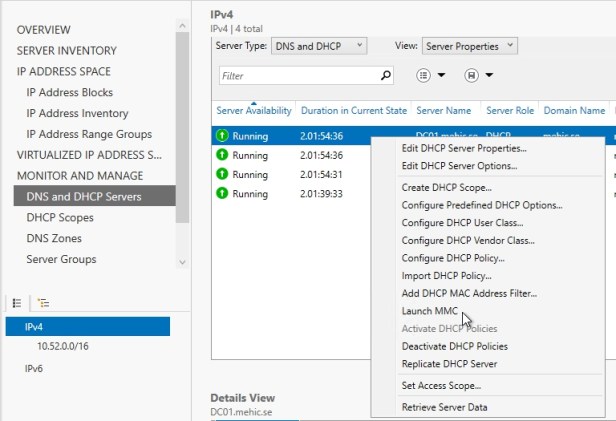
And there is our reservation.
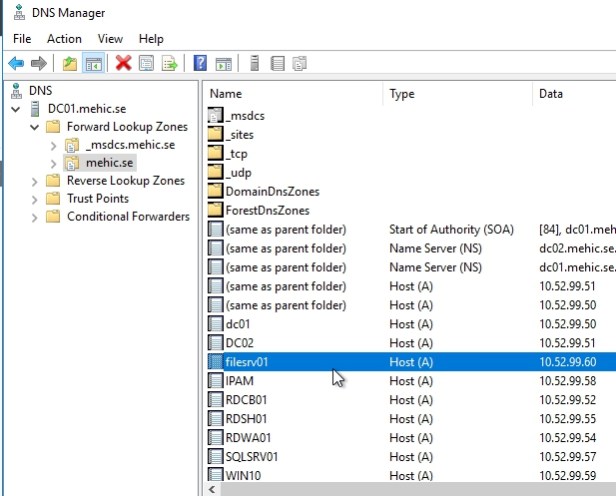
We can do the same for the DNS
IMPORT IP ADDRESSES TO IPAM
What if we have many IP addresses which needs to be imported to IPAM. One way would be to use .CSV. One of the things what you will hear about IPAM is that the IPAM replace spreadsheet. Spreadsheet is the traditional way that organizaitons have managed IP address reservations. You open spreadsheet and you type in the MAC and IP address and when someone wants the new IP address you go to the spreadsheet and figure out which static address is available and then you update the spreadsheet. The idea of the IPAM is to allow you to get rid of the spreadsheet.
I’ve already created a file called IPAM and the only thing you have to really know when you’re doing this is to create the different columns that IPAM actually requires just to get that address in place, and I believe these are the minimum columns that are required, IP address, managed by service, service instance, device type, ip address state, assignment type, and you see here, this is literally just a comma-separated values file.

For us to be able to import this into IPAM we need to have .csv file so I will rename mine to ipam.csv. I’ll come back to server manager and choose to import IP addresses

and point this to the desktop where I’ve stored this file,
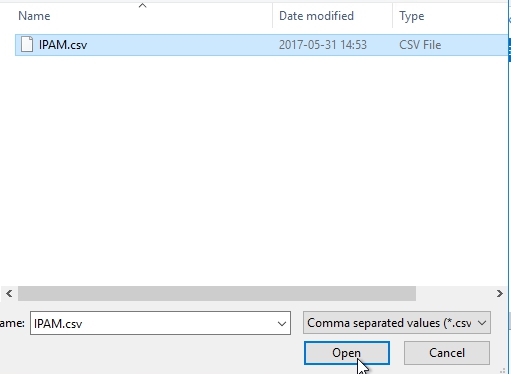

and that’s it.
Another way would be to directly migrate from your existing DHCP environment to IPAM. If you have for example reservations or leases you can import them directly from dhcp server which is new in Server 2016. In the past you had to run script to do that.
Let’s create new reservation on our DHCP server. Click on DNS and DHCP servers and right click on our DHCP server and choose Launch MMC
Create a new reservation

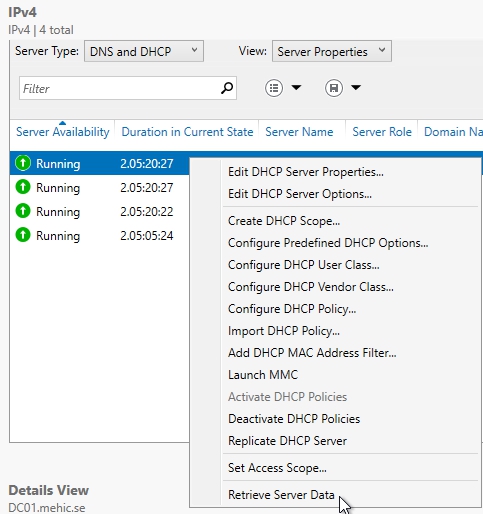
When that is done, close the DHCP mmc and right-click on DHCP server and select Retreive Server Data
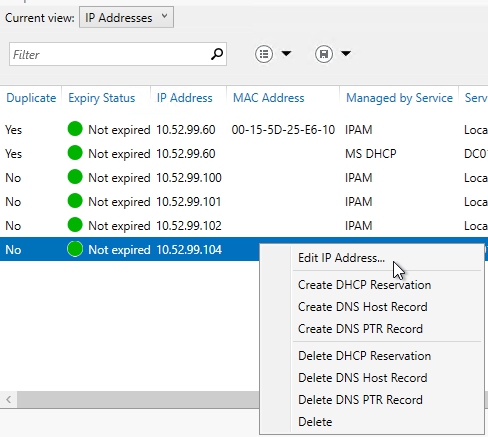
What IPAM do right now, it reaches out to that DHCP server and pull in reservation data. Wait for that task to complete and click on IP Address Block, change the View to IP Addresses, click on refresh and you will be able to see that reservation.

What we can do now is to right-click on that IP address and select Edit IP Address.
Here we can see all the information about that particular device.


MONITOR UTILIZATION
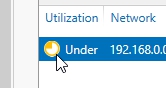
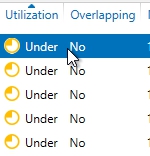
Now with those addresses currently in the database, one of the big reasons to have IPAM is so that you have a comprehension of how many addresses you have available, how close are your address spaces from being over-utilized. When do you need to start talking with your network team to request additional subnets? Well, you can see on the left is this column called Utilization that references how utilized space actually is, and if you take a look very closely, you can see that this little pie chart here will evolve depending on how many addresses are actually being used.
Now, the neat part about this utilization of address space is, by default, there are some settings that determine what an over-utilized versus under-utilized address space is, and if you prefer to change those, you can actually do so if you click on Manage –> IPAM settings.

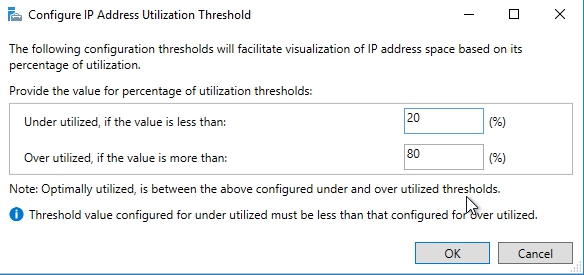
Click on Configure Utilization Threshold,

20% is for under-utilized, and 80% for over-utilized. So if you want to you can adjust those for the entire server for what the utilization calculation is going be, this is the configuration for the entire server.
To avoid very long posts we will continue with our configuration in Part 3 which will cover the IPAM Administration groups in deep (RBAC – what you can do and where you can do it) and how we can manage DHCP and DNS server with IPAM. We will also take a look at IPAM Audit.
Thanks for reading!
Cheers,
Nedim

Another perfect post. Congrats.
I am looking forward to third part!
Many thanks for IPAM articles.
LikeLiked by 1 person
Great post Nedim, 5 stars for your effort
LikeLike
You are awesome bro, thanks
LikeLike