 – SSO & High Availability")
After a very long brake we will continue with RDS 2016 and we will start with RD Web Access SSO and High Availability. You will notice that the new domain is NM.COM and that is because I am preparing things for Active Directory Domain Services and VMM 2016 posts so I decided to re-build and move RDS to this one.
RD WEB ACCESS SINGLE SIGN-ON
The purpose behind Single Sign-on is that my Windows credentials will get passed to the RD Web Access server and I won’t have to re-logon to the page. The first step we’re going to need to do is make sure there’s a trusted certificate for the RD Web Access page and for the RD Connection Broker. Then we’ll configure Group Policy, and in Group Policy we’re going to have to make a number of changes. We need to set up Credential Delegation, which is going to allow the credentials to be passed to the browser, we need to tweak Remote Desktop to make sure that it doesn’t prompt for a password, and then we’ve also got to set up Internet Explorer to tell Internet Explorer it’s allowed to pass our Windows credentials to the RD Web Access web page. Some of the configuration will be done in IIS when we change over from Forms Authentication to Windows Authentication. We’re still going to have to go through and edit the Web.config to make sure that the authentication gets changed over
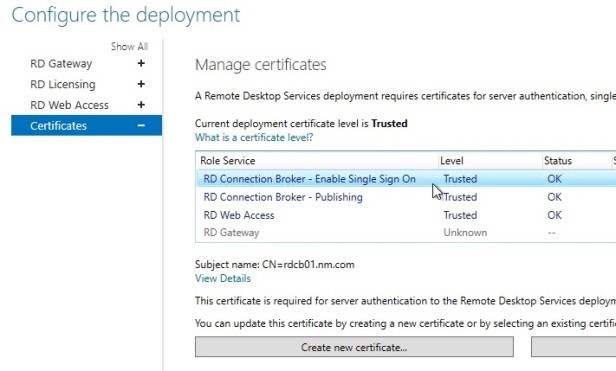
- So the first thing that we need to do is request a certificate for the Connection Broker and add that to the list of trusted certificates. This time I am not using wildcard but will later on. (You can use wildcard)
2. Go to the Remote Desktop Web Access Service and configure IIS
RDWeb –> Authentication

Here we want to disable Anonymous Authentication and enable Windows Authentication

Even though we’ve done that, we still need to directly edit the files that are used in the RD Web Access web page.
3. Edit web.config file
C:\Windows\Web\RDWeb\Pages –> Right-Click on web.config file and select edit

Now if you look, these symbols here (<!–) mean that something is commented out, and Windows Authentication is commented out, Forms Authentication is active. We want to change that.
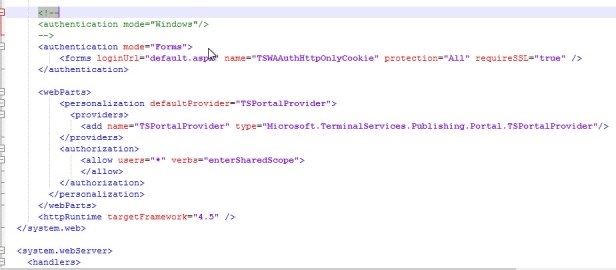
So I’m going to cut this <!–, and paste it in in front of Forms, and then I’ll take the end comment and paste it in after the end of the Forms Authentication. There’s two other sections that we have to comment out as well.

These lines need to look like this. Save the file when done.

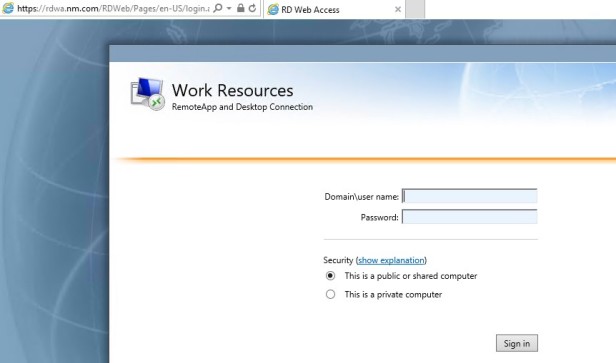
When we go into the Web Access page, we’re asked to choose whether it’s a public or private computer, but because we want Single Sign-on, we don’t want the users to have to make that choice, so we’re actually going to go in and set it up so that automatically it will be listed as a private computer.
Go to C:\Windows\Web\RDWeb\Pages\en-US and edit Default.aspx

Scroll down and find public and there’s a public Boolean that says show the PublicCheckBox, which is false, but PrivateMode is false as well. We’re going to change that to true so that it’s automatically considered a private page and it’ll go right through the logon page. Save the file when done.
4) The last piece is to configure Group Policy
I will edit my Default Domain Policy

Now there’s a number of changes that we need to make. First of all, on the computer side in Policies, Administrative Templates, we’re going to go into System and change Credentials Delegation.

I’m going to open this up, enable the policy, and then I have to list the server. You preface it with TERMSRV and a forward slash, and then the fully-qualified domain name of the RD Web Access server. And I’m actually going to copy this because we’re going to use that again.
I’m going to do the same thing for Allow delegating default credentials. Enable it, show the servers, and add that same thing as the value.

My next step is to go into Windows Components and find Remote Desktop. So here’s under the Remote Desktop Services, we’re going to open up the connection client and where it says Prompt for credentials in the client computer, we’re going to change that to disabled, because for Single Sign-on we don’t want to prompt for credentials, so I’ll hit OK on that one.
Now the last thing is to allow Internet explorer to hand over the credentials. We’re going to make the changes both on the computer side and the user side to avoid any problems
Internet Explorer –> Internet Control Panel and click on the Security Pages, and the first thing I want to do is edit the Site to Zone Assignment List. Only sites that are assigned to the Trusted Sites Zone are allowed to use Windows Integrated Authentication.


No go to Trusted Sites Zone and click on Logon Options end enable the policy.
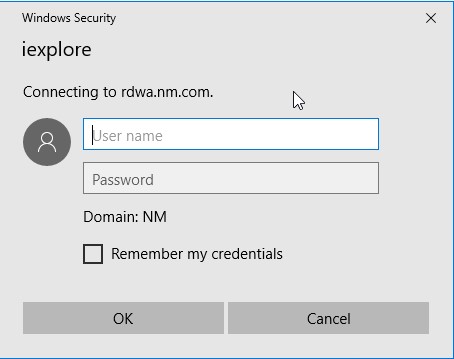
Do the same for the user side and reboot the RD Web Server.
No if you start your web browser and access RD Web Access web page you will be able to access it directly.
RD WEB ACCESS HIGH AVAILABILITY
Round Robin
One way you could do it is with Round Robin. So here we can see we’ve got 2 Remote Desktop Web Access servers, RDWA01 and RDWA02. They each have their own individual IP addresses. We would go into DNS and make 2 records for RDWA.nm.com, each one pointing to the individual IP addresses of the Remote Desktop Web Access server. When the first client consults DNS, DNS sends them to the first record. Now the next client comes in, when they consult DNS, they would be sent to the second record. The third client that comes in, DNS would send them back to the first one, and it would rotate through the records, 1, 2, 1, 2, 1, 2. That’s one way to provide high availability. It’s not the most desirable way.

Network Load Balancing
A better way to do this would be to create a Network Load Balancing cluster or farm. In Network Load Balancing, each of the Web Access servers have their own individual name, RDWA01, RDWA02. They each have their own individual IP address, so very similar to Round Robin. In this case we go into DNS and create a record, and assign it the cluster IP address. It’s got to be some IP address in that range that’s not in use.
Next we install Network Load Balancing on all servers, and we give the Network Load Balancing cluster an IP address. Each of those servers will have that IP address. It’s the only time you’ll see more than one server with the same IP address. When the client consults DNS and gets referred to the cluster IP address, all of the servers receive that request, and then they figure out between them who is going to actually service the client, and with three servers they’ll split the work 2 or more ways depend on how many rdwa servers you have. The advantage of this is that each of the servers sends out something called a heartbeat every second. It’s just a packet that goes between them. If one the servers misses their heartbeat for 5 seconds, the other servers will be like, oh, RDWA01 is down, let’s split the work two or more ways, so it provides the best high availability for the client.

Requirements
• Add additional RD Web Access Servers
• Configure DNS
• Install NLB on all RD Web Access Servers
• Create a NLB Cluster
First thing we need to do is have more than one Remote Desktop Web Access server, so let’s add one.


When you add second rd web access server be sure to go to Certificates under the deployment properties and fix the error before continuing with the configuration.
Now before we configure the servers for Network Load Balancing, let’s just take a quick look at the difference between them.
I just made a small customization so that you actually see which of the servers in the cluster are servicing the request.
RDWA01

RDWA02

OBS!!! In real life we want to make those servers look identical because we don’t know to whom the client will be referred, but in our case I’m leaving them different so we can see the effects of Network Load Balancing.
Our next step is to configure DNS, to set up our record for the Network Load Balancing cluster.

Next we need to install Network Load Balancing feature on all RDWA servers, in my case 2. Open Powershell as admin and run
icm -computername <computername> {Install-WindowsFeature nlb -IncludeAllSubFeatures -IncludeManagementTools}

(When using virtual machines, you need to make sure that you go into the properties of the network card on each virtual machine, and in the Advanced Settings enable MAC spoofing, otherwise it won’t work).
We are now ready to create NLB Cluster. It doesn’t matter on which member of the farm we create the cluster, we’re going to add both in eventually anyway.

Right-click Network Load Balancing clusters and make a new cluster.

I will specify RDWA01 as the first host in a cluster, click next

If I had multiple network adapters or multiple IP addresses, I could specify which one would be used for the cluster. Sometimes it’s recommended that you have one network card for the cluster and one network card for other traffic. That’s why you have a choice as to which network card is going to be associated with the cluster. In my case I have only one, so that’s the correct one. Click next,

now I need to provide an IP address for the cluster itself, so that’s going to be my 192.168.0.150

On this step we need to give our cluster a name (it should be the same one that you specified in DNS) and choose which operation mode we are going to use.
In Unicast mode, NLB reassigns the station MAC (media access control) address of the network adapter for which it is enabled and all cluster hosts are assigned the same MAC address. Unicast mode induces switch flooding, where all switch ports are flooded with NLB traffic, even ports to which non-NLB servers are attached.
In multicast mode each cluster host is going to keep original MAC address and it’s going to assign an additional multicast mac address to each network adapter so you will have one network adapter in server and each node in cluster will have same multicast mac address. This makes it easier for networks switches and routers that supports multicast to be able to understand how to communicate with the particular host. Multicast doesn’t really solve the network flooding problem.
IGMP multicast – this is the special form of multicast form which will prevent switches from being flooded with network traffic. When you deploy igmp traffic will be forwarded only through switch ports that participate in NLB cluster. What that means that you will need switches that supports that functionality.
In this case I really don’t care so I will use Unicast mode, but you can choose one that is working better for you. Once done click next

Now I can specify which ports the cluster will service, click edit

If all I really want to be directed to the Network Load Balancing feature on the server, I would really just specify the port range that I’m interested in, which in this case would be port 80 and port 443. I’m just going to leave it at all the ports, because I’m not trying to tweak this server to do much of anything else, but if the server had multiple roles you’d need to adjust the port rules. Multiple hosts mean that multiple hosts in the cluster will handle the traffic coming in to the ports that are governed by this rule. Single affinity means that if a client is serviced by one member of the cluster, in the future they will be serviced by that member of the cluster. Network means anybody coming in from that network ID would then continue to be serviced by that member of the cluster. In this case we want to set our affinity to None, because we want each of our RDWA servers to service requests so we can see how Network Load Balancing works. If for some reason you had one specific application that should be serviced by just one member of the cluster, that’s what single host is for. So you have five members of a cluster, they’re all doing web traffic port 80, just one of them is doing SSL. I could do a port rule for 443 that would be Single host, but in this case we want all of the hosts in the cluster to service the requests and we don’t want any particular affinity. Click none and ok finish

Once that is done, we will add our second rdwa server. Right-click on the cluster and select Add host to cluster and click next through the wizard –> finish


Once done we are ready to go different server and test how this will work. Be sure to use cluster name rdwa.domain.com
I got prompt for the credentials because I didn’t configure nothing for the cluster
After specifying the credentials, we can see that I am on RDWA01

If I refresh the page it will take me to different one.
That’s it. Now we are ready to move to session host load balancing. There we will discuss about best practices and how to configure things when we have clients that need to connect with built-in RDP client instead of RD Web Access.
Thanks for reading!
Cheers,
Nedim

Hi
Can we install RD Web Access and RD Broker on the same server then install NLB on the server and use NLB Cluster IP to achieve HA for both roles???
Also can we do the same thing to get HA for the Gateway?
LikeLike
Hi Farrukh,
When you want to use High Availability you need to have at least 2 identiacal servers. To have RD Web Access HA you will need to have 2 RD Web access servers deployed. Same is for RD Gateway or any other RDS role.
LikeLiked by 2 people
Hello! I just would like to give a huge thumbs up for the good data you’ve right here on this post. I will likely be coming again to your blog for extra soon.
LikeLike