Before we dive into configuration, it’s important to cover a few key concepts of the Microsoft Graph PowerShell SDK. In the second part of our Mastering Microsoft Graph PowerShell SDK course , we’ll look at how to connect to Microsoft Graph, what scopes are, and the types of permissions available.
CONNECTING TO MICROSOFT 365 WITH MICROSOFT GRAPH POWERSHELL
To get started, the first question is how we connect to Microsoft 365 using the Microsoft Graph PowerShell SDK? There are a couple of different approaches available:
- DIRECT COMMAND – This is similar to how we connect using the standard Microsoft 365 PowerShell modules. We run a connect command (
Connect-MgGraph), provide credentials and establish a session with the specific service we want to manage.- Key characteristics:
- Uses delegated permissions
- Runs in the context of the signed-in user
- Permissions are limited to what the user is allowed to do
- Requires interactive sign-in
- When to use it:
- You’re running ad-hoc or manual tasks
- You’re learning or testing Microsoft Graph
- You’re performing administrative tasks as yourself
- Key characteristics:
- AZURE APP REGISTRATION – In this approach, an application is registered in Azure Active Directory with the required permissions already assigned. Instead of using user credentials, the connection is made using a certificate, which the PowerShell SDK uses to authenticate and connect to Microsoft Graph.
- Key characteristics:
- Uses application permissions
- Runs without user interaction
- Permissions are defined explicitly on the app
- Ideal for automation and background jobs
- When to use it:
- You need fully automated scripts
- The script runs as a scheduled task or pipeline
- No user sign-in is possible or desired
- The task requires tenant-wide access
- Key characteristics:
A connection may also require consent, either for the current session or across the entire tenant. This comes into play when we define scopes. For example, if we want to manage all users in Azure Active Directory, we must request the appropriate permissions when running the Connect-MgGraph command. At that point, consent is often required to approve those permissions before the connection can be established.
WHAT ARE MICROSOFT GRAPH POWERSHELL SCOPES?
We need to use them when we connect, but what really are scopes?
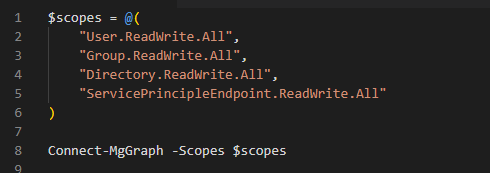
Scopes are essentially Microsoft Graph API permissions. If you’ve ever created an enterprise application or an app registration in Azure AD, you’ll be familiar with the API Permissions section where these permissions are assigned. When using the PowerShell SDK, those permissions are passed into the connect command as scopes, and they must be provided as a comma-separated list. For example, you might specify "User.ReadWrite.All" along with any additional permissions you need.

Or you can do it like this as well
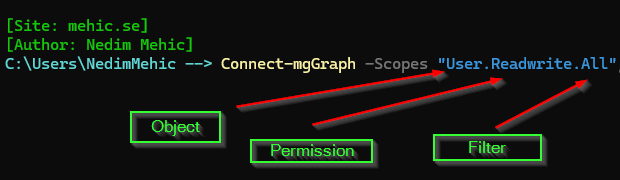
Scopes follow a specific naming format. Typically, they include the object, the permission type, and a qualifier that defines the level of access. While not every scope follows this exact pattern, most include at least the object and the permission, with the qualifier usually defining access to all resources or a more limited subset.
DIFFERENCE BETWEEN DELEGATED AND APPLICATION PERMISSIONS
Within Microsoft Graph permissions, there were two different types.
- Delegated Permissions – Delegated permissions are used when an application or connection needs to access Microsoft Graph on behalf of a signed-in user. In our case, this applies to PowerShell SDK commands that connect using the current user’s identity. For example, when I sign in using Connect-MgGraph and authenticate with a Global Administrator account, the connection is established in the context of that user. Any API permissions required are then delegated to me based on the permissions assigned to my account.
- Application Permissions – This approach is used when working with an Azure app registration. Instead of connecting as the currently signed-in user, the connection is made using the app registration itself, which allows actions to be performed on behalf of multiple users.
FIND AVAILABLE (SCOPES) PERMISSIONS
Sometimes, we may not know which permissions are available, or we might not have access to Azure Active Directory to check the API Permissions tab. Fortunately, we can use the Find-MgGraphPermission cmdlet to explore and identify the available permissions.
Find-MgGraphPermissions <object> -PermissionsType <Any | Delegated | Application>
If you just execute the command as is (Find-MgGraphPermission), it will give you all of the available scopes (both delegated and application). If you want to filter that and just see the available scopes for the user object (example User.Read, User.ReadWrite.All etc.) you can type
Find-MgGraphPermission user -PermissionType Delegated
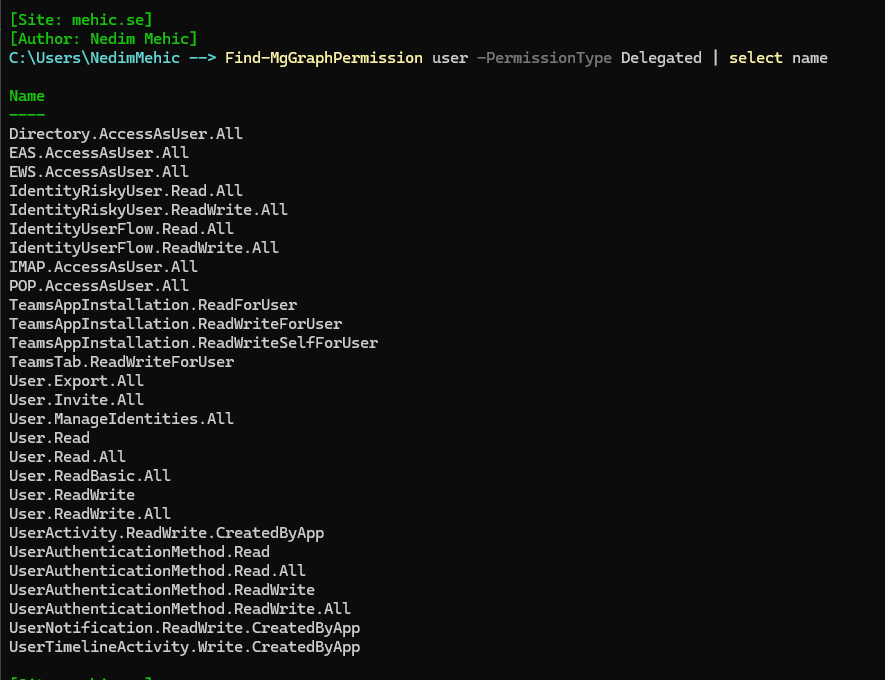
This command scans all of the PowerShell modules installed as part of the standard Microsoft Graph install and returns the names of all available permissions. It’s important to review these carefully, as they show the exact format required when specifying permissions during a connection.
CONNECT TO M365 USING POWERSHELL GRAPH
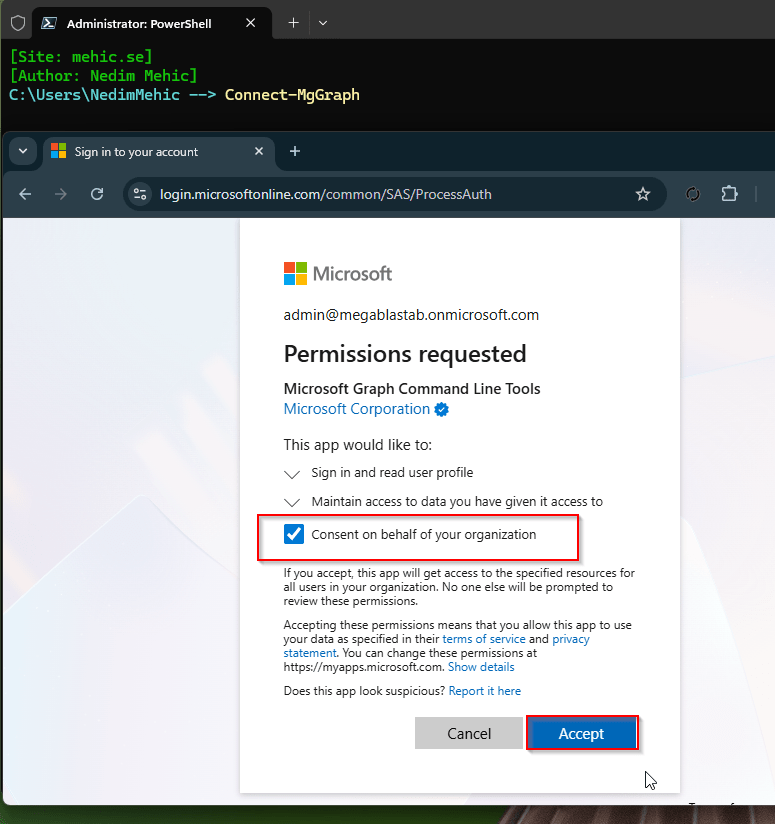
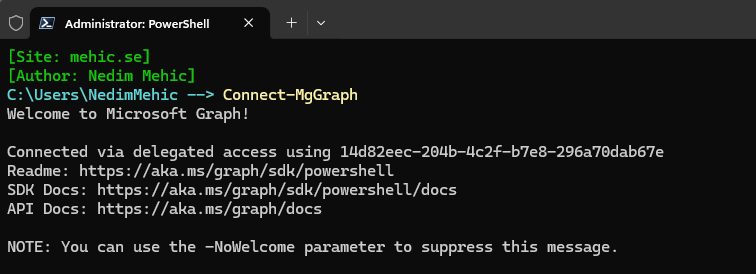
Once we have gathered all the necessary information, we can proceed to connect to Microsoft 365 using the PowerShell Graph SDK. In order for us to connect to Microsoft 365 using the PowerShell Graph, we can simply type Connect‑MgGraph. When you run the command, it will launch a web link. This will open the login screen, where you can enter the credentials for the account you want to use to access your tenant.

The first thing you’ll notice is a permission request—this is the consent step. Since no specific scopes were passed, you can select Consent for the organization and then click Accept to proceed.
Note!
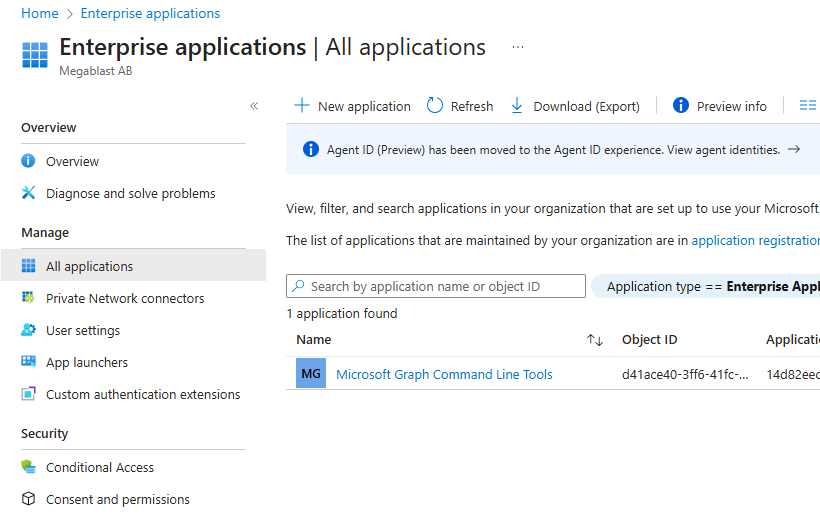
Once you consent for the connection, within Entra ID directory, a new Enterprise application gets created called “Microsoft Graph Command Line Tools”
We get the welcome notification when it is done.
You might be wondering which scopes and permissions were granted, especially since we didn’t pass anything other than connecting to Microsoft Graph. Fortunately, we can check this using the Get-MgContext cmdlet.
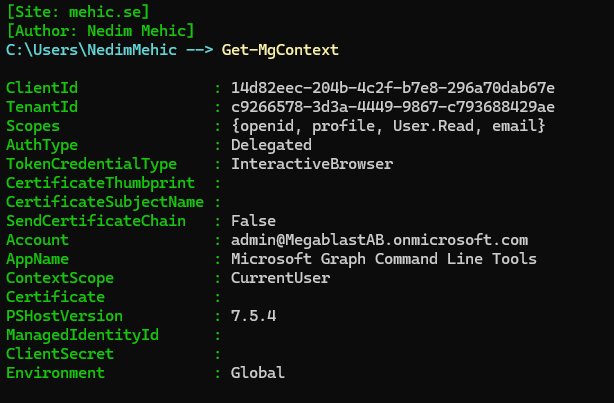
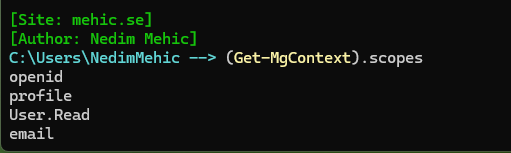
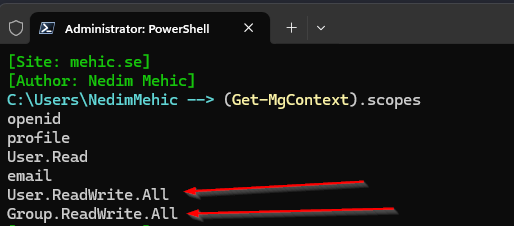
We can also filter the results to focus on the information we need. Our focus here is on the scopes and permissions granted so we can filter it and see only that information. As you can see, this returns 4 permissions. You might be wondering where these permissions come from. If there is already an existing connection in the same session, it will retain those permissions. Any additional permissions you request, or any time you reconnect, will be added to the existing set. Because this is the first time I connect to this tenant with MgGraph I only see 4 permissions.
If additional permissions are required, we can add them by running Connect-MgGraph again, this time including the -Scopes parameter. So if I add user and group scope you can see, the connection now includes the Read.All user and groups permission, which is different from the previous consent we went through.
Connect-MgGraph -Scopes "User.Readwrite.All","Group.Readwrite.All"
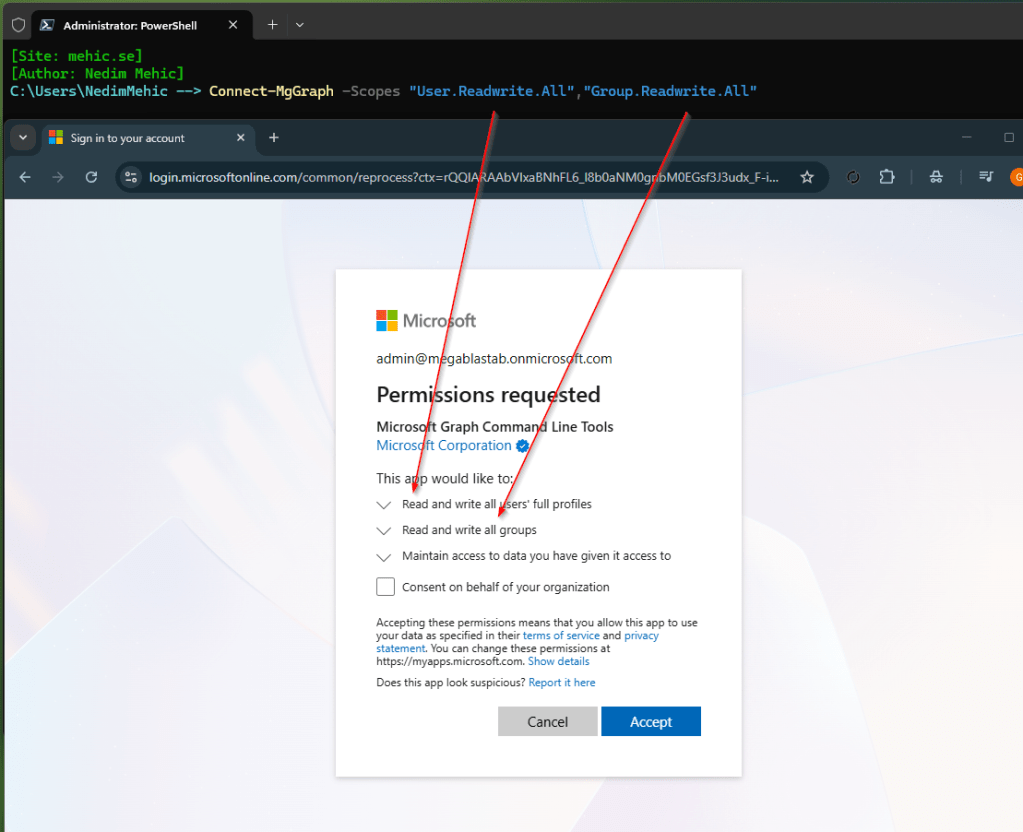
If I execute Get-MgContext we should now see that a user and group-related permission has been added to the list. So just be aware you may end up with fairly powerful permissions if you’ve been either playing with the scopes or you’ve been adding or removing from the scopes.
DISCONNECTING POWERSHELL GRAPH / WHAT HAPPENS TO PERMISSIONS
When reviewing the Microsoft Graph PowerShell module, you’ll find a command called Disconnect-MgGraph. Running this command signs you out of Microsoft Graph for the current PowerShell session. However, it only ends the session and does not revoke any permissions that were granted in Entra ID.
What this means is when you reconnect with different scoped permissions, the new scopes are appended to the existing ones. As a result, checking the current context may show extra permissions that weren’t intended. This can lead to issues, either granting too many or too few permissions.
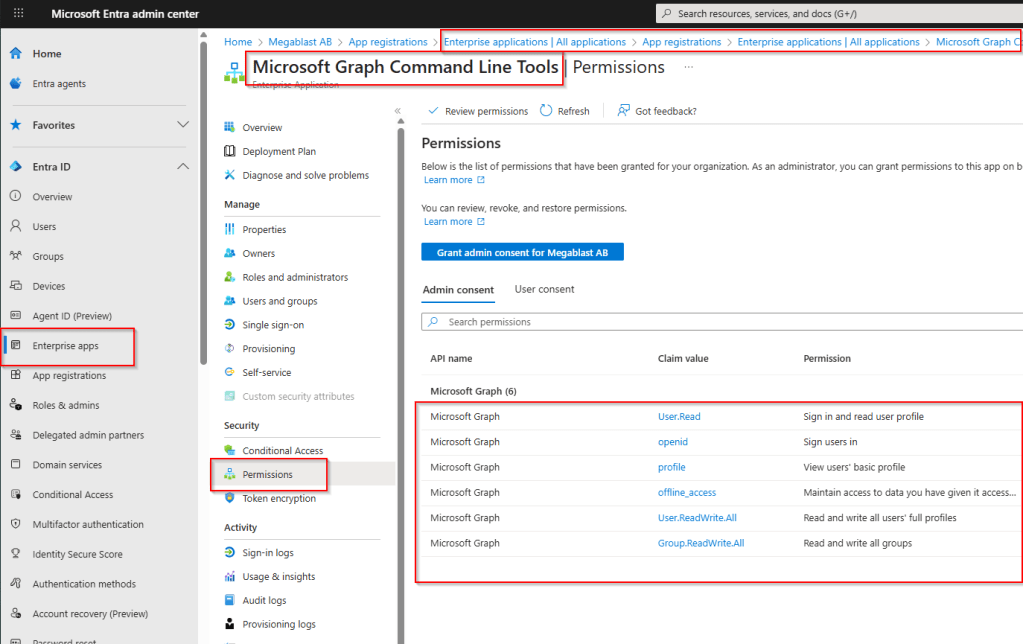
As I mentioned before, when you consent for the first time a new Enterprise application gets created called Microsoft Graph Command Line Tools so if you inspect the Microsoft Graph Command Line Tools application in Entra ID under the Permissions section, you will see the permissions assigned.
Note!
You can’t revoke permissions directly in the User consent tab using the portal. To specifically revoke user-consented permissions you can use Remove-MgOauth2PermissionGrant cmdlet.
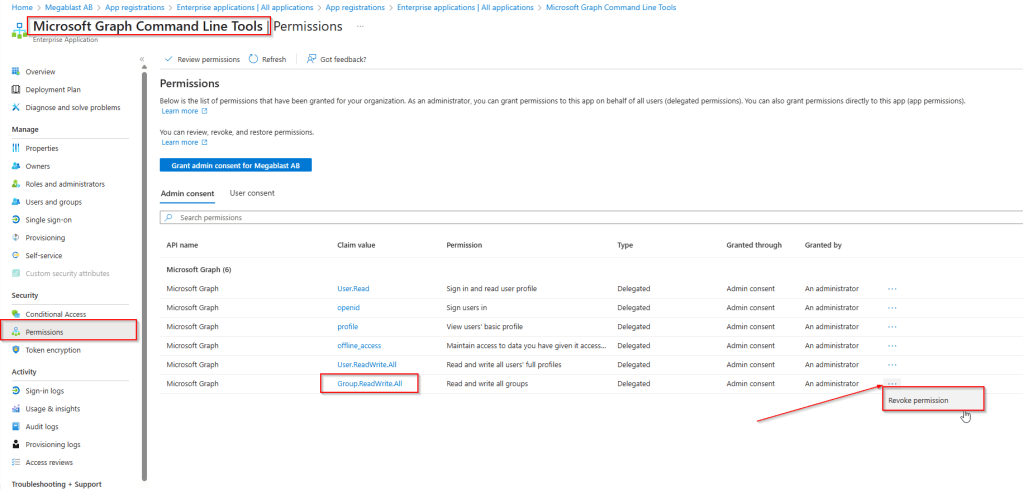
To revoke Microsoft Graph PowerShell permissions navigate to the Microsoft Graph Command Line Tools application in the Enterprise Applications section –> Go to the Permissions tab, locate the permission you want to revoke and click the three dots (⋯) next to the permission and select Revoke Permissions.
If you have a lot of permissions and if you need to revoke all of them, you can delete the enterprise application. The next time you connect and approve the consent request, the application will be recreated using only the permissions specified in the -Scopes parameter.
Removing Service Principle with Powershell
The service principal is the identity created in your tenant that an application uses to authenticate and access resources. Removing this will remove the application itself which will remove all the permissions as well.
The Get-MgServicePrincipal command is used to retrieve service principals. Since the list can be quite extensive, it’s recommended to apply a filter to streamline the search and quickly locate the desired service principal.
Note!
Get-MgServicePrincipalwithout filtering just lists all service principals, but due to pagination, sometimes it doesn’t return everything.Keep in mind to use filter or -All parameter to retrieve whole list.
Get-MgServicePrincipal -All | sort displayname
Get-MgServicePrincipal -Filter "DisplayName eq 'Microsoft Graph Command Line Tools'"

To retrieve scopes we need to use Get-MgServicePrincipalOauth2PermissionGrant command.
(Get-MgServicePrincipalOauth2PermissionGrant -ServicePrincipalId d5a69770-2352-4577-a7ea-9866a5bf5999).Scope -split ' ' | ForEach-Object { $_ }

Note!
For delegated access you will need to have Application.ReadWrite.All and Directory.ReadWrite.All permissions.
To remove Service Principle we can use Remove-MgServicePrincipal command.
$ServicePrincipal = 'd5a69770-2352-4577-a7ea-9866a5bf5999'
Remove-MgServicePrincipal -ServicePrincipalId $ServicePrincipal

Now if we go back to Entra ID –> Enterprise Applications we will notice that Microsoft Graph Command Line Tools app is deleted.
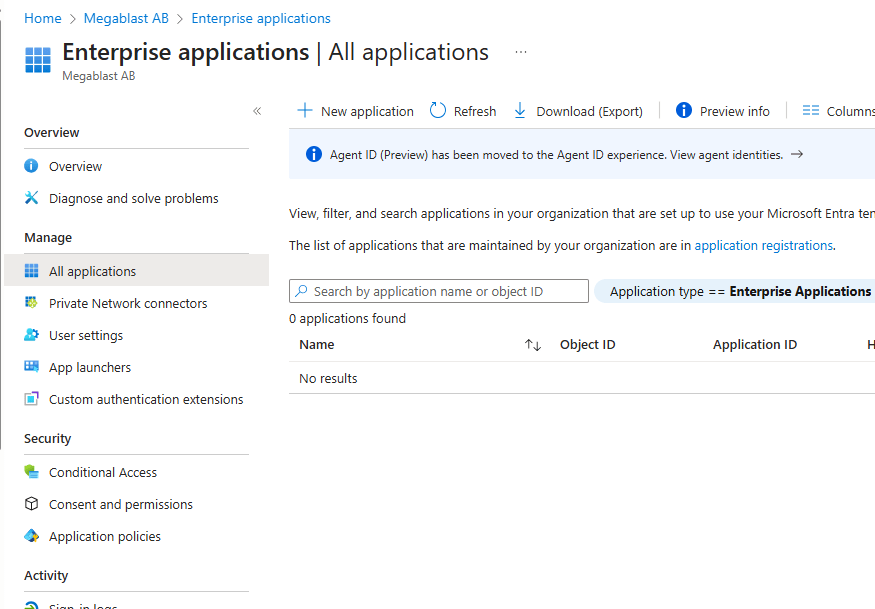
After reconnecting using the Connect-MgGraph command, the Microsoft Graph Command Line Tools app will be recreated with its default permissions.

That wraps up the second part of our Mastering Microsoft Graph PowerShell SDK series. In this section, we covered connections, explored scopes, and dove into permissions—everything you need to understand how your PowerShell commands interact with Microsoft Graph.
In the next part, we’ll take a closer look at app registrations—how to set them up, assign permissions, and use them to automate tasks across your tenant.
Stay tuned.


Leave a comment