As we continue our journey of mastering the Microsoft Graph PowerShell SDK, this third part focuses on using an app registration.
How do we establish a connection using an app registration, and why would we opt for this method? While it’s easy to authenticate by simply passing scopes to the Connect-MgGraph command, creating an app registration provides a more structured and consistent approach. This setup offering greater control, stability, and suitability for automation or long-term integrations.
Modern IT automation increasingly depends on secure, programmatic access to cloud services, and Microsoft Graph sits at the center of that ecosystem. Whether you are managing users, querying Azure AD, or automating administrative tasks across Microsoft 365, Microsoft Graph provides a single, unified API to do so. However, before any script or tool can interact with Graph, it must first be trusted—and that trust is established through app registration.
Note!
Think of App Registration as creating an identity card for a script or application so Azure knows who is calling and what they’re allowed to do.
Advantages of App registration
- Application only access – The first advantage is that app-only access grants permissions directly to an application rather than to a user. This means there’s no need to pass user credentials, access is limited to a specific, well-defined endpoint.
- Requires administrator consent – It also requires administrator consent, ensuring that access is controlled and cannot be granted arbitrarily. Only an administrator can approve these permissions, and they are based on a predefined set of scopes.
- Predefined permissions – This controlled model prevents ad-hoc connections with excessive or unintended permissions, making access easier to manage and govern.
Types of authentication
When you use PowerShell to authenticate a registered app, you need a way for your script to prove its identity to Microsoft Graph. Microsoft Entra ID supports two primary ways:
- Password-based authentication (client secret) – This approach is easy to create and use (the key is a long string you copy into your script) but it is less secure and not recommended for unattended or enterprise-grade automation. Use client secrets for simpler scripts or testing.
- Certificate-based authentication – is more secure than a client secret because the private key never leaves your system, reducing the risk of leaks or misuse. Use certificates for production or long-running automation
Now, before we move forward, there are a few prerequisites to put in place.
SECURING POWERSHELL GRAPH APP
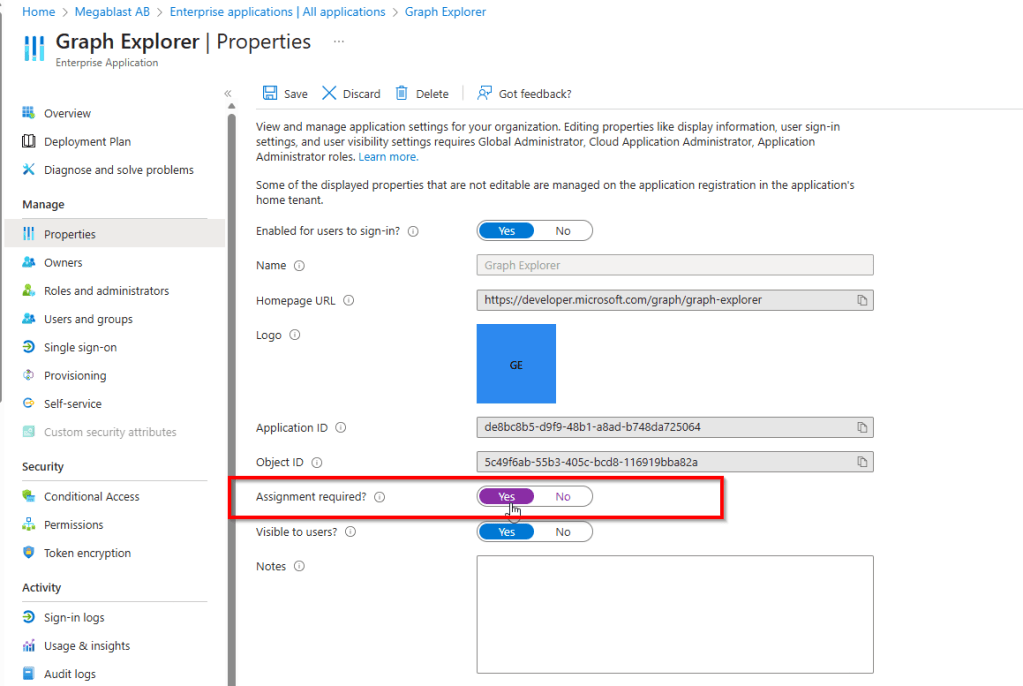
- App Assignment – It’s best practice to configure any application used to connect to Microsoft Graph to require assignment in Microsoft Entra. This ensures that only users who have been explicitly assigned to the application can access it and utilize the permissions granted.
- GA Accounts – To reduce risk, the Global Administrator role should be assigned to only a small number of trusted users. Microsoft recommends limiting this role as it provides unrestricted access to all tenant settings, including critical security configurations.
- Dedicated Admin Account – Instead of relying on an existing privileged administrator account, a separate, dedicated admin account can be created specifically for performing tasks through Microsoft Graph PowerShell. This approach allows tighter control over access, as Conditional Access policies can be applied to these accounts to enhance security.
- Control tenant-wide consent – Providing tenant-wide consent for application permissions in Microsoft Entra is a highly sensitive action, particularly for high-impact permissions that could cause serious harm if misused. Only authorised team members should review and approve such requests, ensuring the permissions are necessary, appropriate, and aligned with organisational requirements.
- Admin consent requests – The admin consent request workflow in Microsoft Entra provides an effective way to implement a structured approval process for application permissions. It allows permissions to be requested, reviewed, justified, and formally approved before being granted within the tenant.
App Registration Prerequisites
- Certificate – You’ll need a certificate. This can be either a self-signed certificate, which we are going to use in this part, or one issued by a trusted certificate authority..
- Register an application in Microsoft Entra ID – you’ll need to register an application in Microsoft Entra ID and grant it the necessary permissions (scopes).
- Upload the public key of the certificate – you’ll need to upload the public key from the certificate, as it is required to establish the connection
With the prerequisites covered, the first step is to create a certificate. Start PowerShell as admin and type in.
$certName = "CN=PSGraphAuth"
$cert = New-SelfSignedCertificate `
    -Subject $certName `
    -CertStoreLocation "Cert:\CurrentUser\My" `
    -KeyLength 4096 `
    -KeyAlgorithm RSA `
    -HashAlgorithm SHA256 `
    -KeyExportPolicy Exportable `
    -KeySpec Signature

# Show thumbprint
$cert.Thumbprint
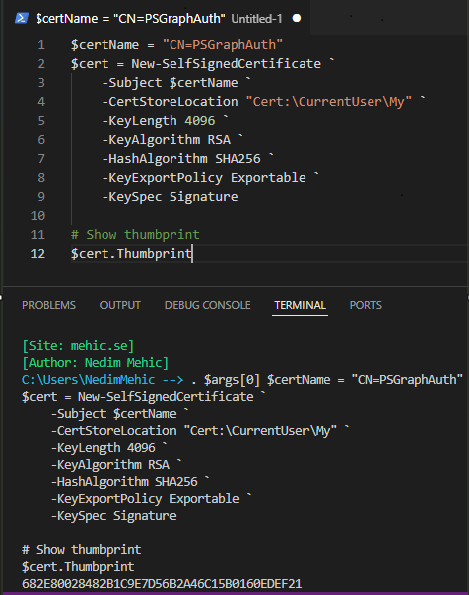
Make sure to copy this thumbprint, as it will be required when establishing the connection.
Note!
The self-signed certificate created in the previous step has a limited validity period and will eventually expire. In the App registrations section of the Entra ID portal, the Certificates & secrets screen displays the expiration date of the certificate.
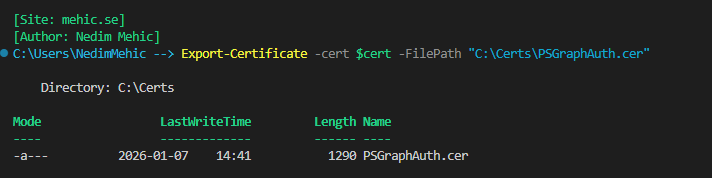
Once the certificate is created, we can export it in two formats: as a .cer file, which is the standard certificate format, and as a .pfx file, which includes the private key.
Export-Certificate -cert $cert -FilePath "C:\Certs\PSGraphAuth.cer"
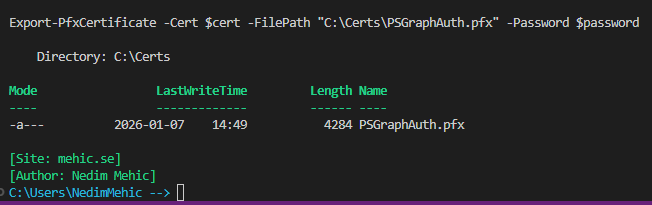
Now let’s export the PFX as well.
$password = ConvertTo-SecureString -String "StrongPasswordHere" -Force -AsPlainText

Export-PfxCertificate -Cert $cert -FilePath "C:\Certs\PSGraphAuth.pfx" -Password $password
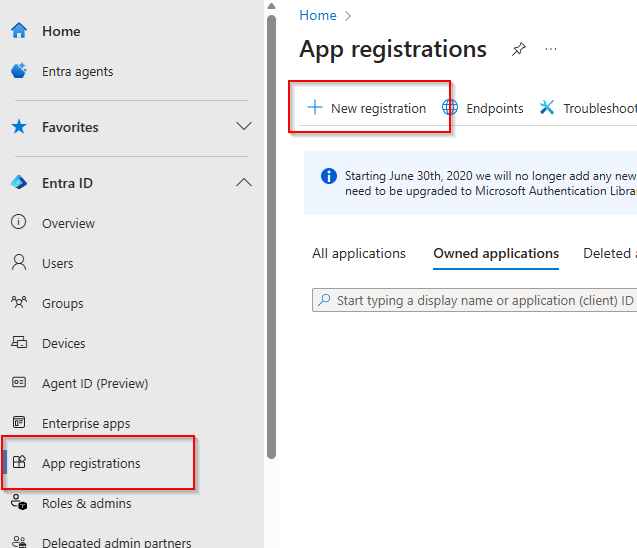
Now that the certificate is ready, I’ll switch to the browser, where I’m logged into the Entra ID directory. From the portal, I’ll scroll down to the App registrations section and click New registration.
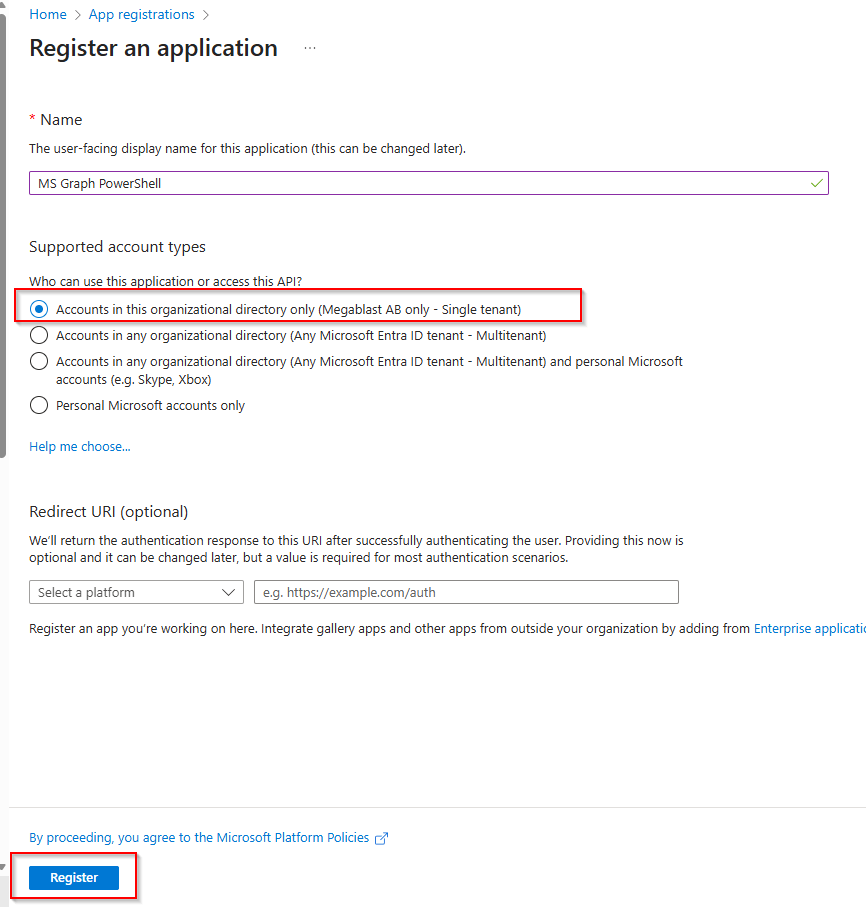
For this example, I’ll name the application MS Graph PowerShell. I’ll leave the setting as Accounts in this organization only to ensure that only users within my organization have access. Regarding redirect URI options, we don’t need to configure anything for this scenario, so we can simply click Register to complete the app registration.
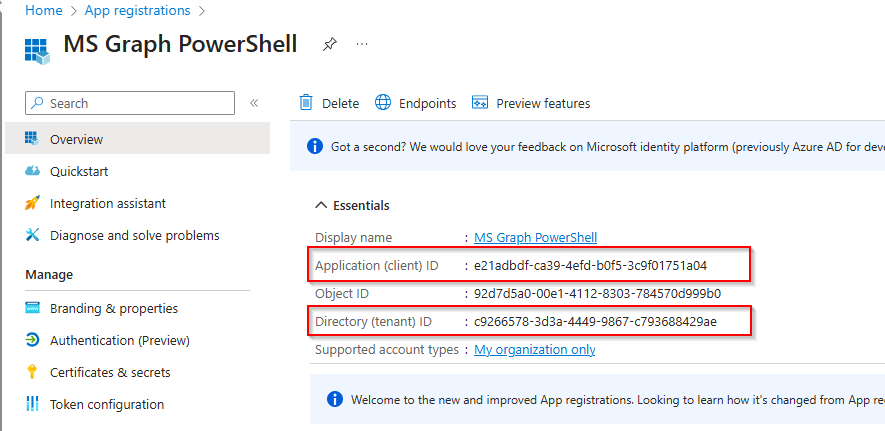
The registration process will return a variety of information. At this point, there are a few specific values that we need to make sure to copy for later use and those are Application (client) ID Directory (tenant) ID and the certificate thumbprint (at this stage, the thumbprint won’t be visible yet).
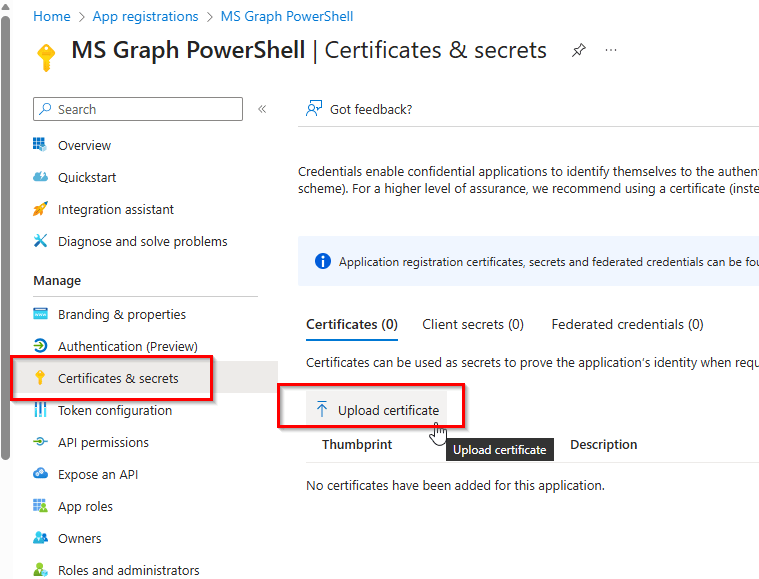
Next, navigate to Certificates & secrets. You’ll see three tabs: Certificates, Client secrets, and Federated credentials. Go to the Certificates tab and click Upload certificate
Note!
Federated credentials allow a service principal (your app) to authenticate using an external identity provider (like GitHub Actions, Azure DevOps, or any system supporting OpenID Connect), instead of storing a password or certificate in Entra ID.
Locate the public certificate file on your Desktop, assign it a descriptive name, and click Add. If you didn’t note the thumbprint when creating the certificate, you can retrieve it at this step. This thumbprint is essential for establishing the connection.

At this stage, we have three important pieces of information. First, the Client ID, which uniquely identifies the app registration you created. Second, the Tenant ID, which corresponds to your Azure Active Directory tenant. Finally, the certificate thumbprint, which matches the certificate you generated and uploaded to the app registration.
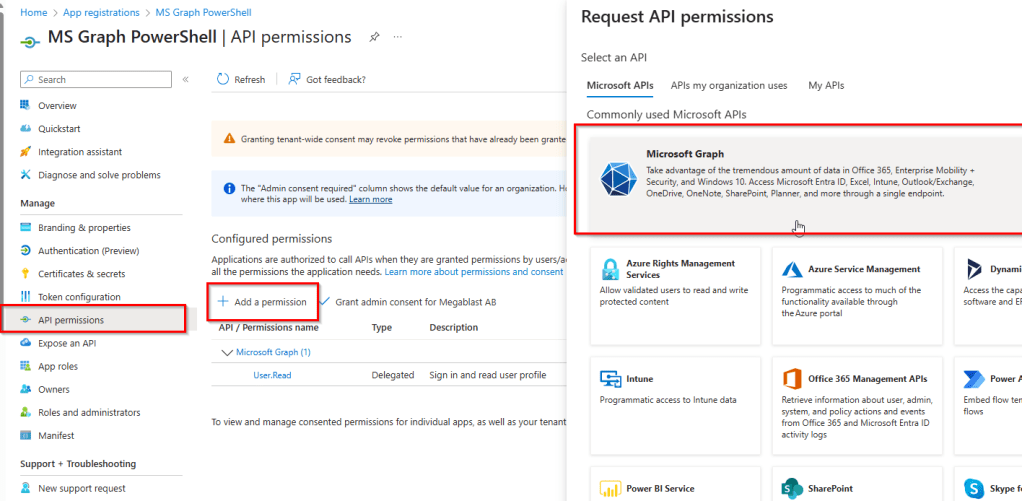
Before attempting to connect, let’s revisit our app registration to review its permissions. In the portal, go to API permissions. At this point, the only permission assigned is User.Read. It’s important to note this, as these are the permissions that will apply when we establish the connection.

Now, let’s connect to MgGraph using this information. I will include -NoWelcome parameter as well to exclude the welcome message. This time, when we connect we will see AuthType –> AppOnly (instead of Delegated) and under the TokenCredentialType –> ClientCertificate (instead of InteractiveBrowser) .
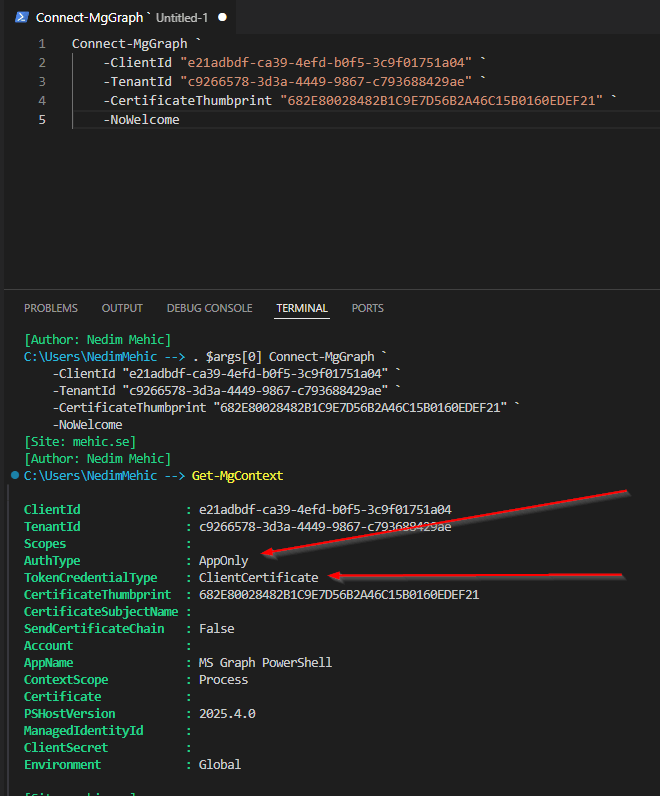
You may notice that the scopes are currently empty, which is expected since we haven’t added any permissions yet. At this stage, the only permission assigned to the app is User.Read. If we try to run any command to retrieve information, we won’t get any results. This outcome is expected and confirms that the app currently has no access and that everything is working as it should.
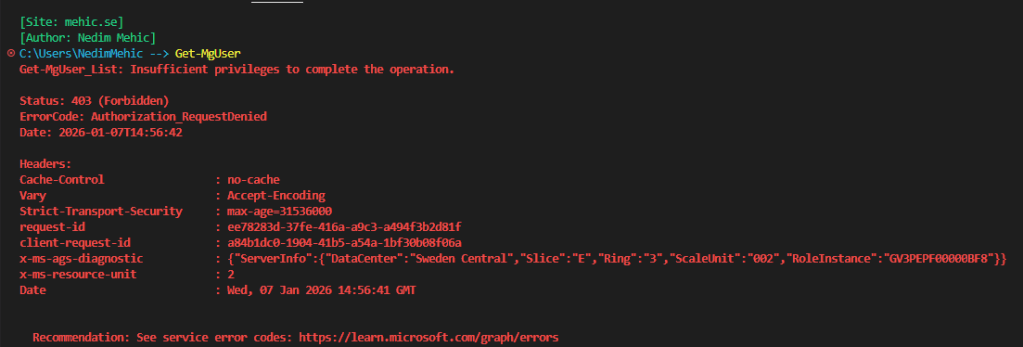
Important!
The User.Read permission allows us to read the profile of a signed-in user. However, because an app registration in Entra ID is not a user account, it cannot retrieve any information. In other words, User.Read is a delegated permission that applies to a real signed-in user—not to the app itself.
To add the required permissions, switch back to the browser, click on API Permissions and select Add a permission –> Microsoft Graph
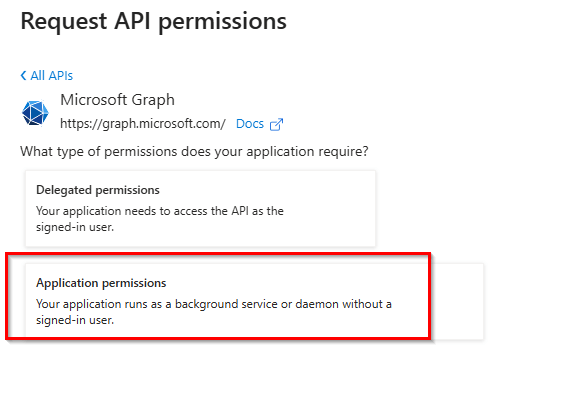
In this case, delegated permissions will not be used. Instead, application permissions will be applied, as the access is required by an application rather than a signed-in user.
In the permissions search, type User, and you’ll see the full list of user-related permissions that can be assigned.
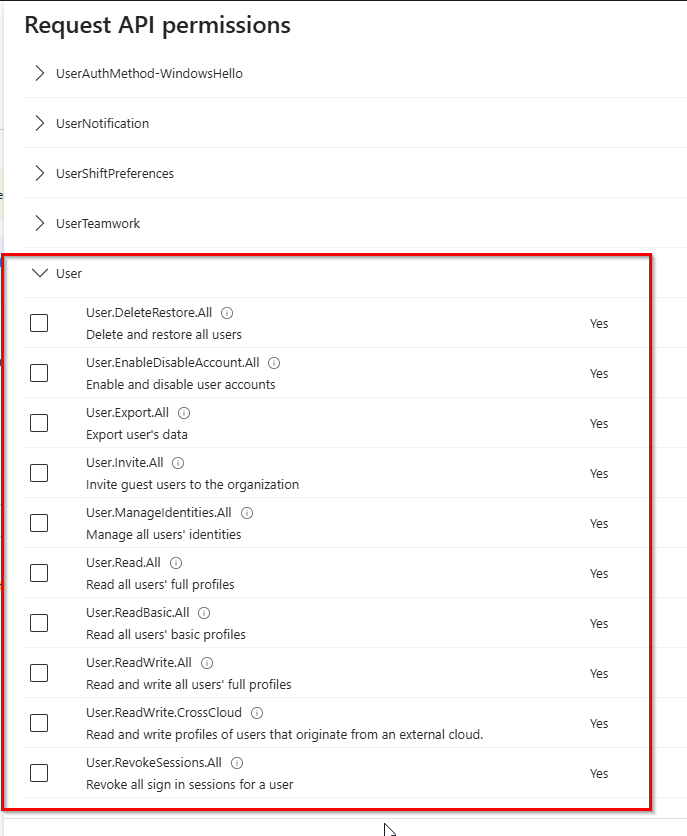
I will just add User.ReadWrite.All and click on Add Permissions. After adding them, you’ll notice a status indicating Not granted for Megablast.
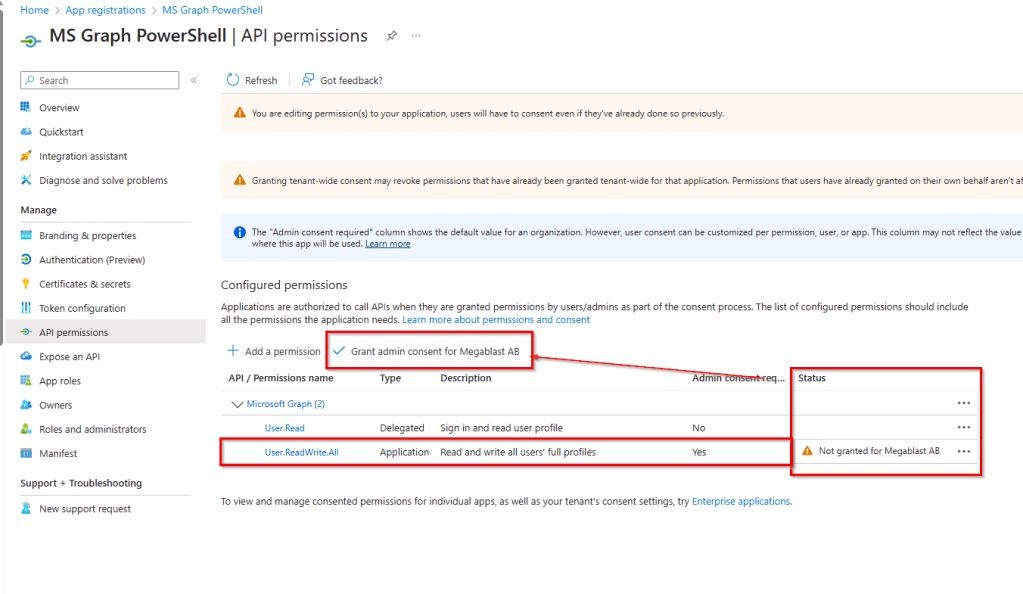
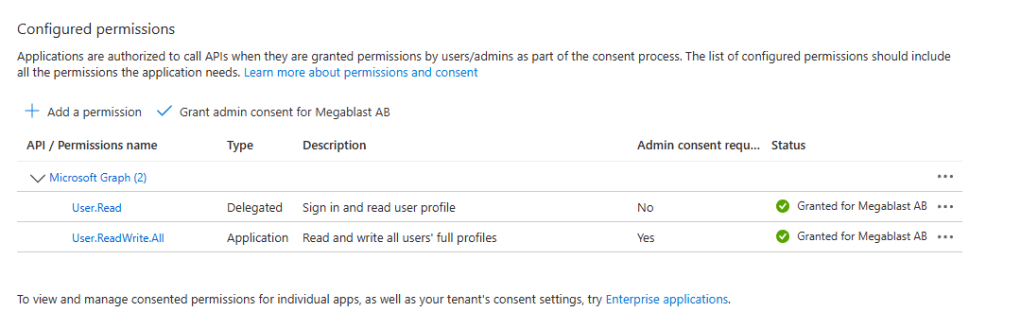
To enable these permissions, click Grant admin consent (This means that when you make the connection, there’s no admin consent required), confirm by selecting Yes, and within moments, the status should update to Granted for Megablast.
Now let’s go back to powershell and run the Disconnect-MgGraph command to disconnect the current session. After that, we’ll reconnect to Microsoft Graph and run Get-MgContext to check the current context. This time Scopes field will be populated.
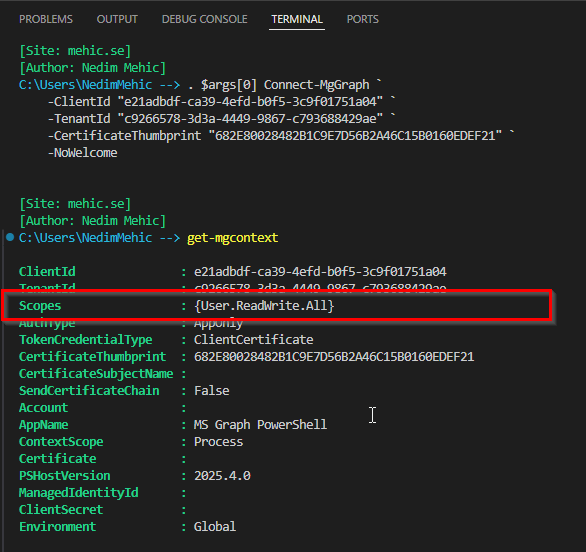
As expected, the context now shows User.ReadWrite. When connecting using an app registration, we don’t pass scopes directly in the connection. Instead, the app relies on the permissions that are predefined and associated with the app registration itself.
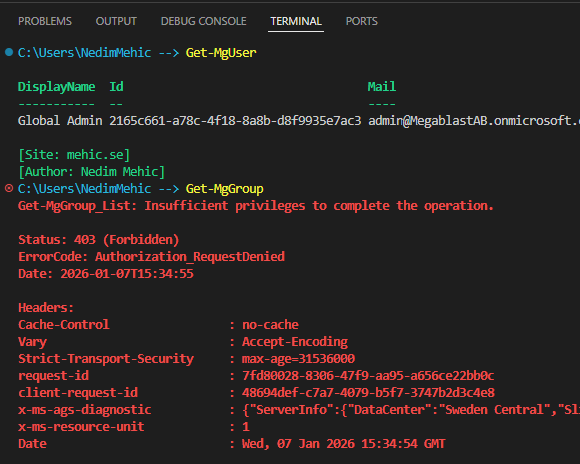
If I run the Get-MgUser command now, I can successfully retrieve the list of all users. However, if I attempt to retrieve all groups, I will receive an error. This behavior is expected and confirms that the permissions are working exactly as configured.
Connecting with Powershell Graph using client secret
An app secret functions like a password for the application. It proves the app’s identity to Azure and allows it to access resources according to the permissions assigned. However, app secrets have inherent security risks. Since they are essentially passwords, they must be stored securely and rotated regularly, any accidental exposure could allow unauthorized access to your tenant. For this reason, certificates are generally recommended for long-lived automation scenarios.
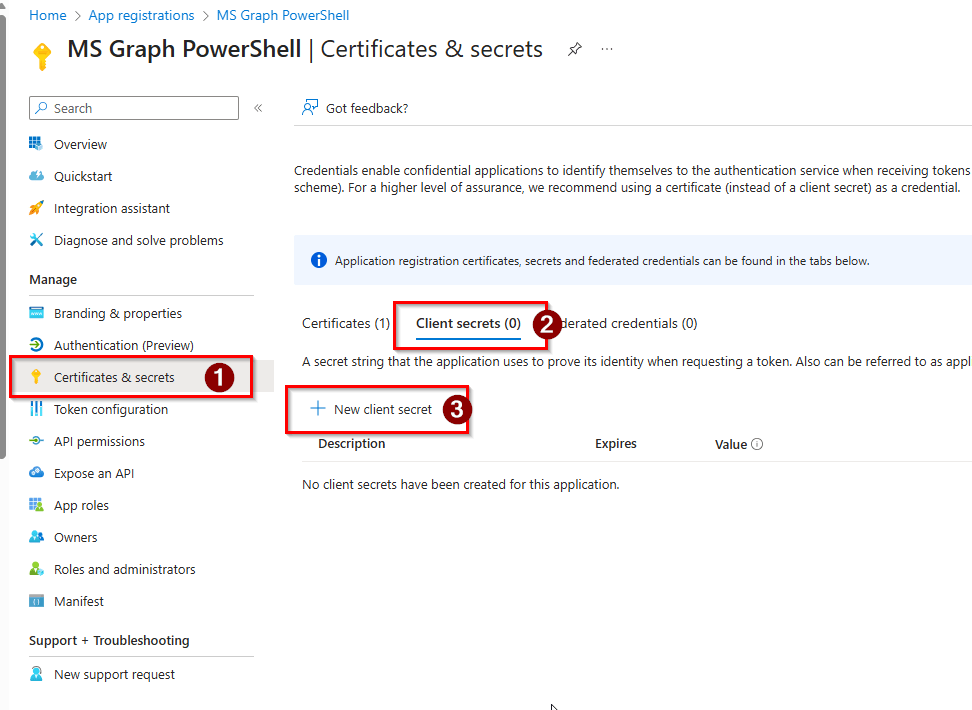
First step is to create a new client secret. Click on Certificates & Secrets, client secrets tab and click on New Client Secret
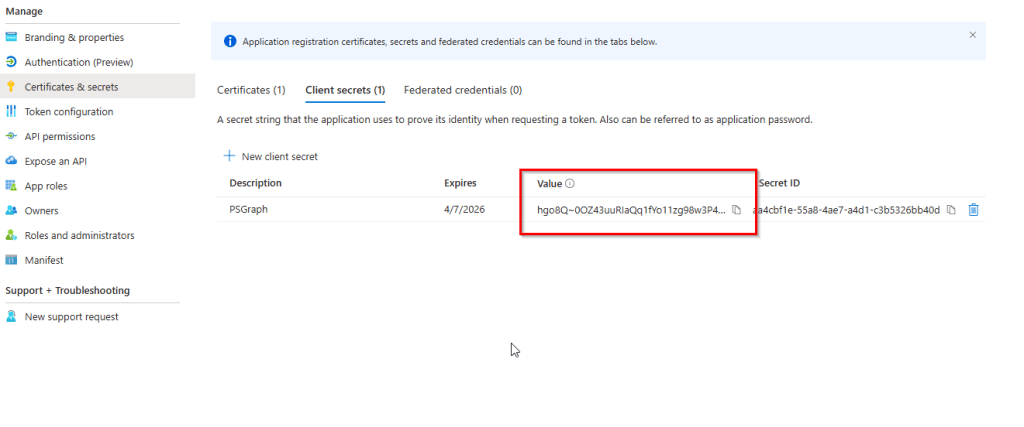
Provide a description for the client secret and select an expiration period that aligns with your security and operational requirements. Once done, click on Add

The next step is to copy the secret value, as it will be required when establishing the connection.
Connect to Microsoft Graph with a client secret
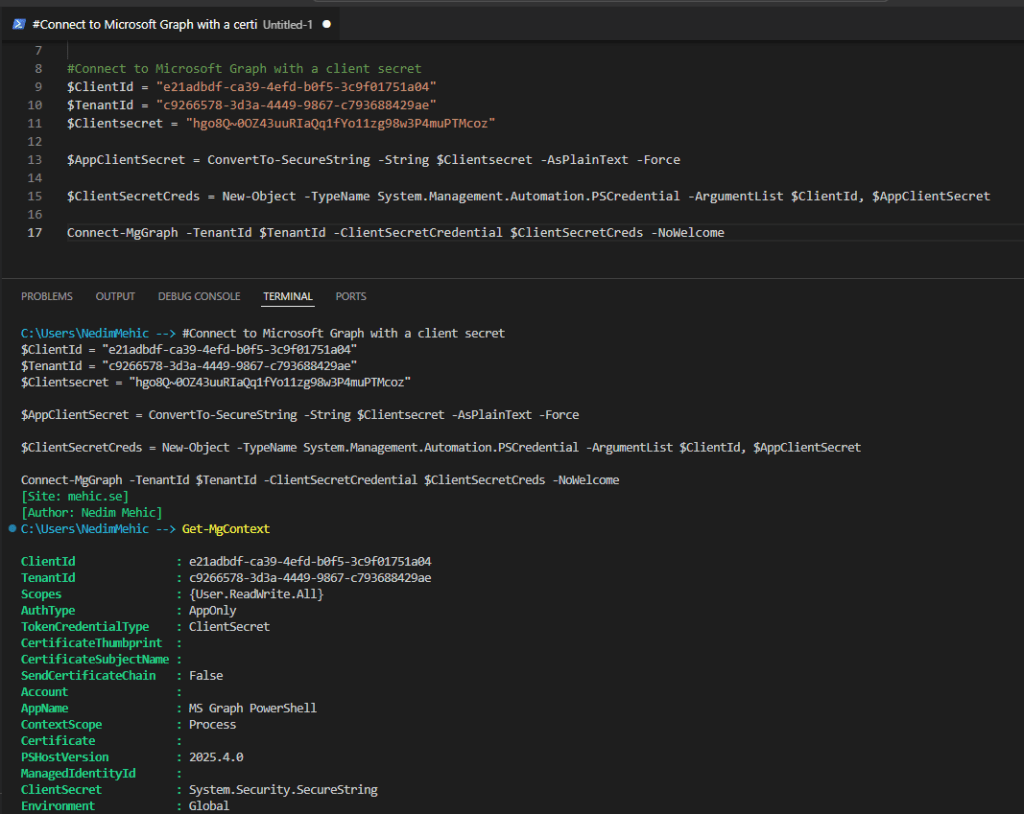
#Connect to Microsoft Graph with a client secret
$ClientId = "e21adbdf-ca39-4efd-b0f5-3c9f01751a04"
$TenantId = "c9266578-3d3a-4449-9867-c793688429ae"
$Clientsecret = "hgo8Q~0OZ43uuRIaQq1fYo11zg98w3P4muPTMcoz"

$AppClientSecret = ConvertTo-SecureString -String $Clientsecret -AsPlainText -Force

$ClientSecretCreds = New-Object -TypeName System.Management.Automation.PSCredential -ArgumentList $ClientId, $AppClientSecret

Connect-MgGraph -TenantId $TenantId -ClientSecretCredential $ClientSecretCreds -NoWelcome
We can now see that the TokenCredentialType has changed from ClientCertificate to ClientSecret, while the scopes and overall permission level remain the same.
In this third part of the Mastering Microsoft Graph PowerShell SDK series, we explored app registrations in depth—why they matter, how they work, and when to use them. We covered the prerequisites, discussed the key advantages, and looked at the different authentication options available. Along the way, we configured a self-signed certificate and connected to Microsoft Graph using certificate-based authentication, before also creating a client secret and signing in that way.
With these foundations in place, you now have a good understanding of how app registrations enable secure, controlled, and repeatable access to Microsoft Graph. This approach is essential for automation, background processes, and enterprise-grade solutions.
Thank you for taking the time to read this article. I hope you found it useful and gained practical insight into working with app registrations in Microsoft Graph. Stay tuned for the next part of the series, where we’ll continue building on these concepts.


Leave a comment