When working with Microsoft Graph, one of the biggest challenges is not writing PowerShell code—it’s understanding the API itself. With hundreds of endpoints, multiple permission models, and constantly evolving features, it’s easy to feel lost when you’re trying to figure out which request to send and what response to expect. This is where Microsoft Graph Explorer becomes an essential tool.
Microsoft Graph Explorer is a web-based tool provided by Microsoft that allows you to interact directly with Microsoft Graph without writing any code. It lets you authenticate, run REST queries, inspect responses, and test permissions in real time. Before you automate anything with the Microsoft Graph PowerShell SDK, Graph Explorer gives you a safe and fast way to explore the API, understand its structure, and validate your ideas.
Learning Graph Explorer is especially important if you want to master the Graph PowerShell SDK. Behind every PowerShell cmdlet is a REST request to Microsoft Graph. Graph Explorer exposes that reality. It helps you see which endpoint a cmdlet is calling, what permissions are required, how filters and query parameters work, and how the data is actually returned. When something doesn’t behave as expected in PowerShell, Graph Explorer is often the quickest way to troubleshoot the issue.
Accessing Microsoft Graph Explorer
Microsoft Graph Explorer is a browser-based tool, which means there’s nothing to install and no environment to configure before you start using it. You can access it directly by navigating to https://aka.ms/ge (https://developer.microsoft.com/en-us/graph/graph-explorer)
Note!
Microsoft Graph Explorer can be used anonymously, without signing in or connecting to your tenant. When used anonymously, Graph Explorer allows you to send requests to public, non-tenant-specific endpoints and view example responses. No organizational data is accessed, and no permissions are granted. You are simply interacting with the API in a safe, read-only learning mode.
When you browse the link, you will see Tenant Sample, which means you are using Microsoft Graph Explorer anonymously and are not connected to any real tenant or organizational data.
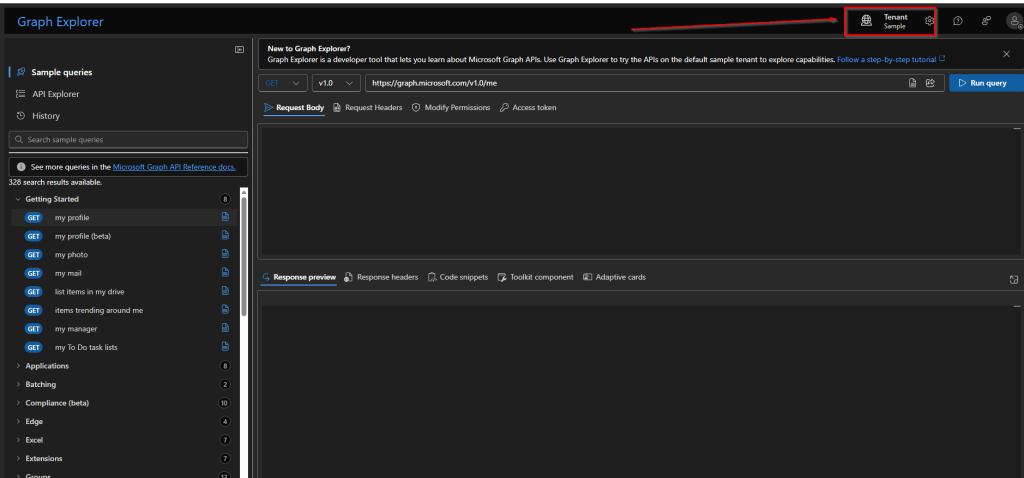
Our first step is to login and connect Graph Explorer to our tenant.
Note!
Sign in with a user account assigned either the Global Administrator or Privileged Role Administrator role. Using an account with elevated privileges ensures that you have the necessary rights to grant consent for various permissions to the Graph Explorer app in Microsoft Entra ID.
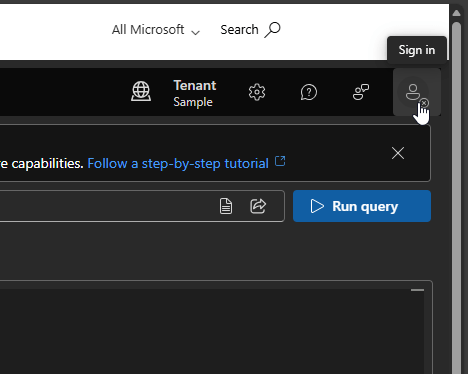
You can do this by clicking the profile icon at the top right of the page, which will load a popout window prompting you to sign in.
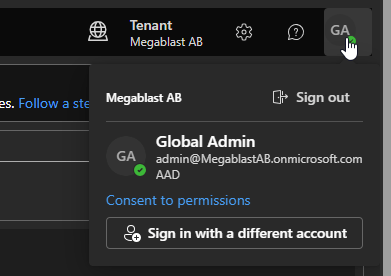
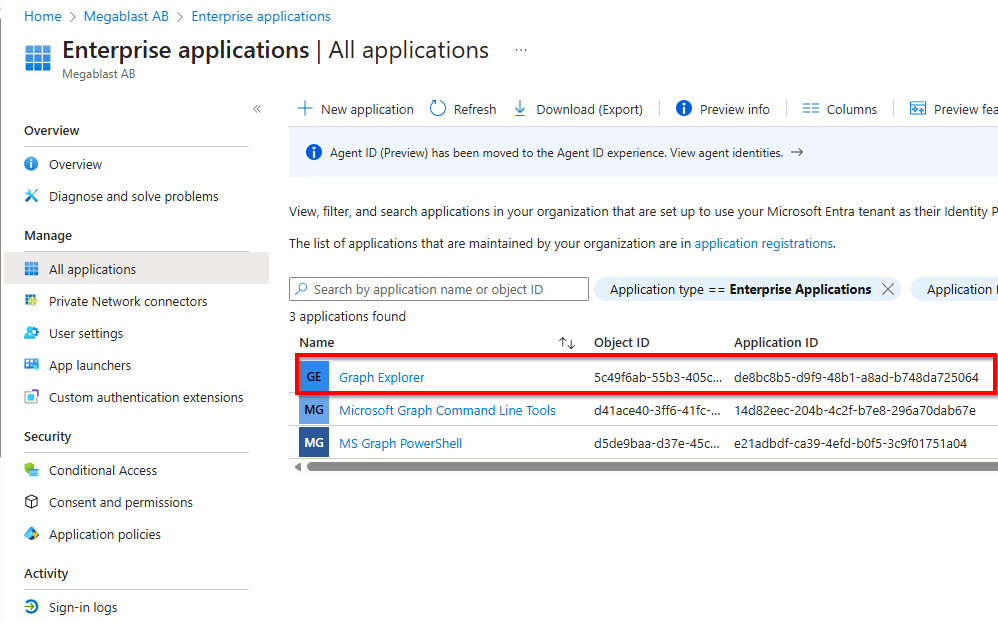
After signing in, Graph Explorer uses a Microsoft-provided application registration (Graph Explorer) in your tenant. This means you don’t need to create your own app registration just to start testing Graph requests. Instead, you can request delegated permissions directly from the interface.
Navigating Graph Explorer
LEFT PANE
We will begin by exploring Microsoft Graph Explorer, starting with the left-hand pane. Using the left pane, you can navigate through and access the primary features of Graph Explorer: Sample Queries, API Explorer (Resources) and History.
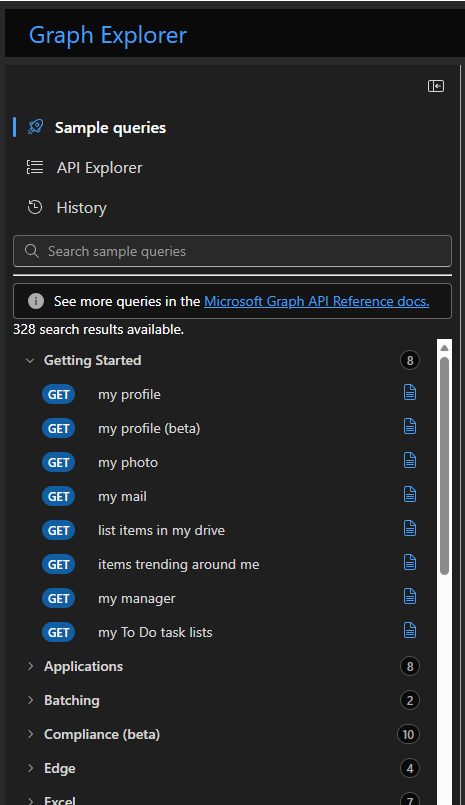
- SAMPLE QUERIES SECTION
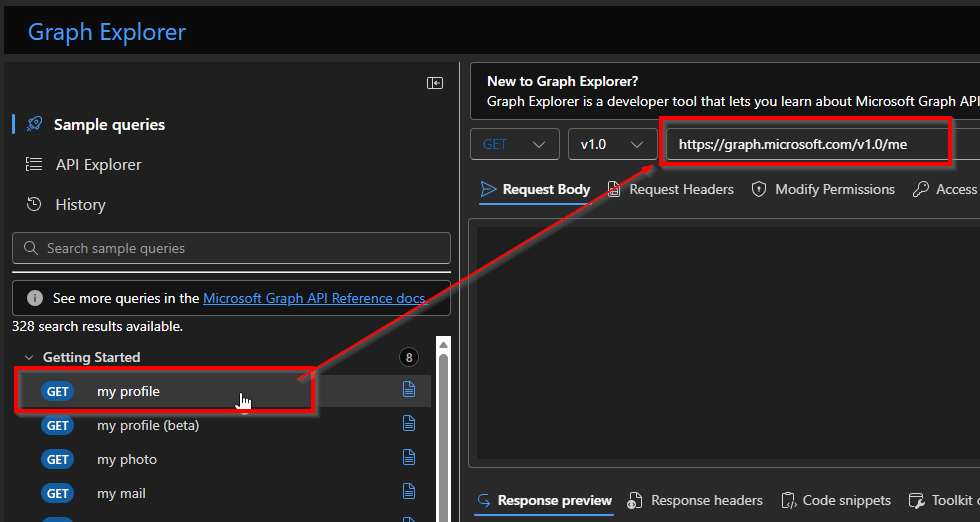
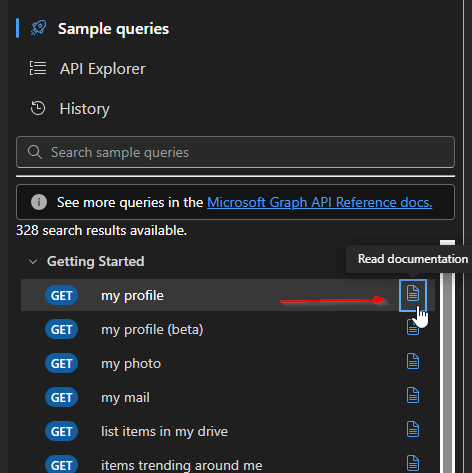
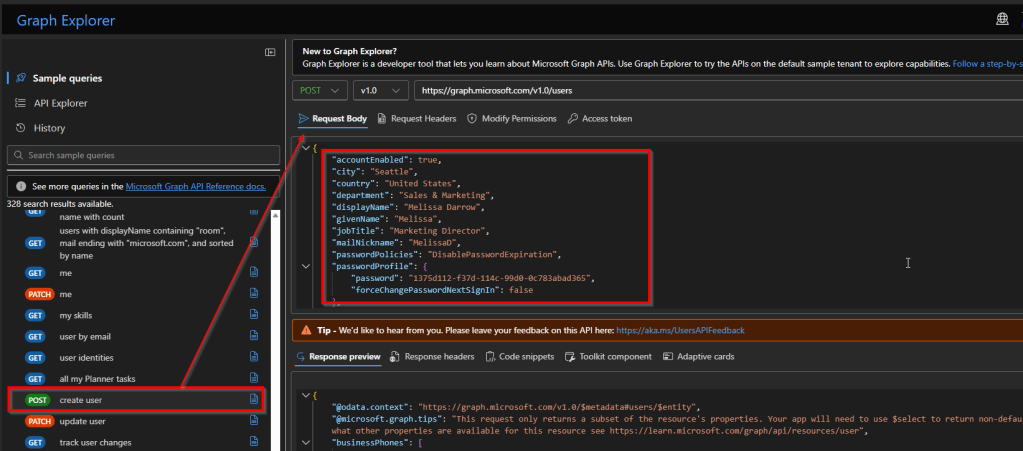
Sample queries provide prebuilt, ready-to-run examples of common Microsoft Graph requests. They are organized by workload (such as Users, Groups, Mail, or Teams) and help you quickly see how typical Graph queries are structured. Sample queries are ideal when you are new to Microsoft Graph or want to understand what an endpoint returns without having to build a request from scratch. When you select My profile, Graph Explorer automatically fills in the URL saving you from typing it yourself.
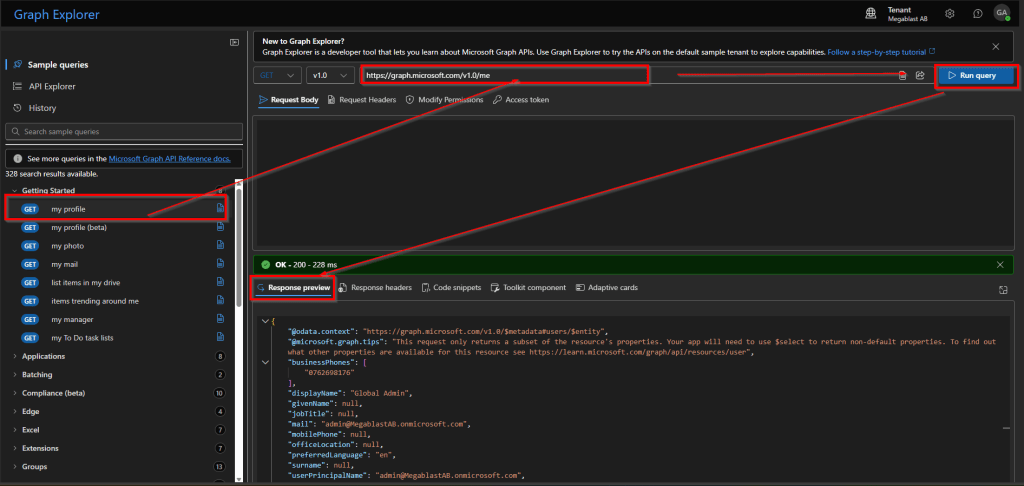
When a query is executed, the results are displayed in the Response preview, which shows the returned data in a structured format, making it easier to review and understand the API response.
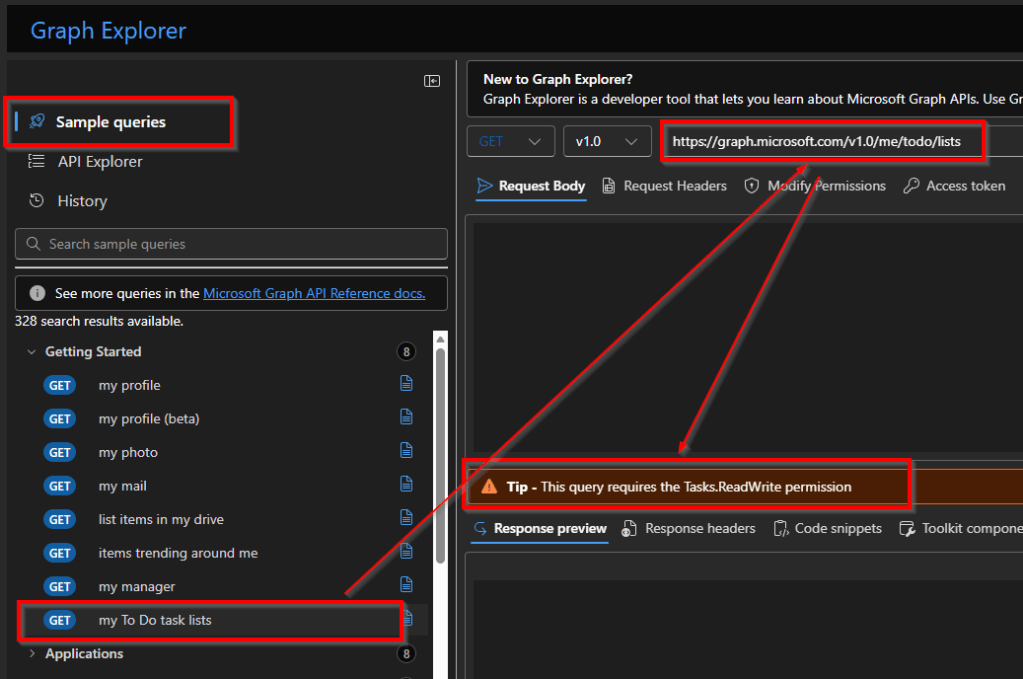
If you choose a sample query and don’t yet have the required permissions, Graph Explorer will notify you with useful info about the permissions needed to run that query or if the query requires mandatory parameter, how to get it and so on.

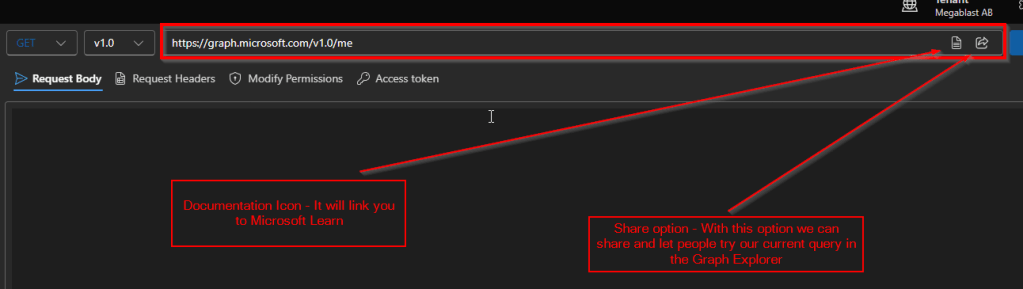
Next to each sample query resource, such as My profile or other available resources, you’ll notice a documentation icon. This icon links directly to the relevant Microsoft Learn (MS Docs) page for that specific Microsoft Graph endpoint. By selecting it, you can access detailed documentation, including endpoint descriptions, required permissions, request examples, and response details, which helps you better understand how the resource works and how to use it correctly.
- API EXPLORER (RESOURCES)
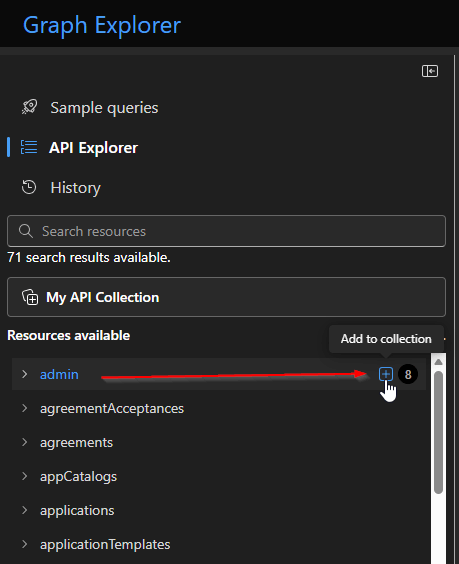
API Explorer is a reference-style browser for the Microsoft Graph API. It lets you explore all available endpoints, their supported HTTP methods, required permissions, and request/response details. Rather than giving you finished examples, it helps you understand the full API surface and choose the exact endpoint and method you need. What is useful here is that we can select specific query and add it to our collection. The My API Collection view in Microsoft Graph Explorer is designed to help you organize, reuse, and document the Graph requests you work with most often.
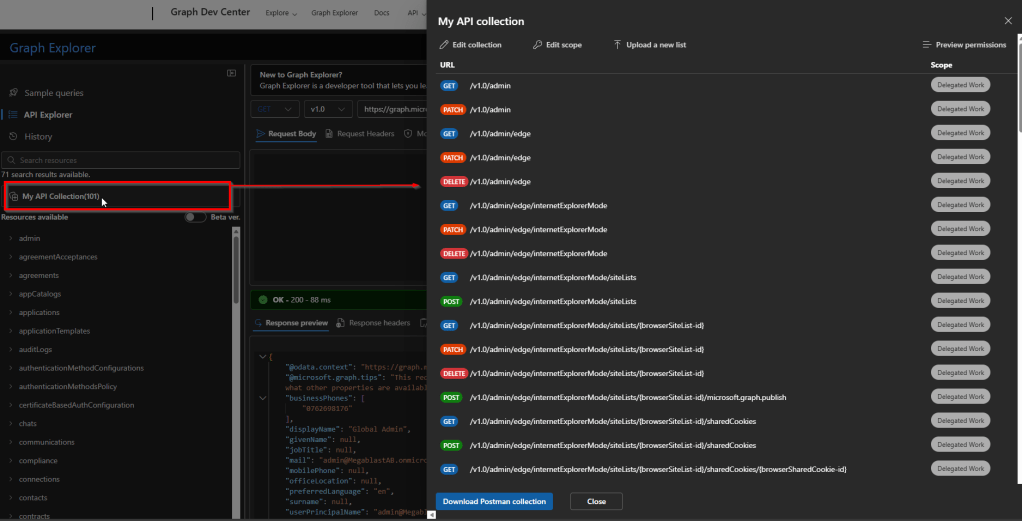
When you’re finished adding resources, click on My API Collection.
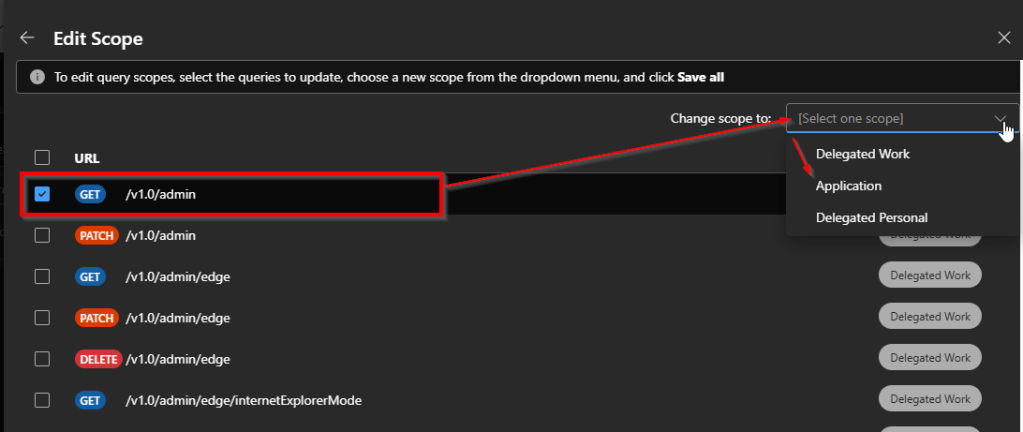
From the collection view, we can Edit the collection and remove URL’s or we can change the scope. For instance, to modify the scope, first select the URL, and then use the Change scope to section to pick the scope you need.
Once done we can export a collection of resources into a Postman collection. By exporting resources to Postman, you’re essentially taking what you discovered in Graph Explorer and turning it into a reusable, professional API testing setup.
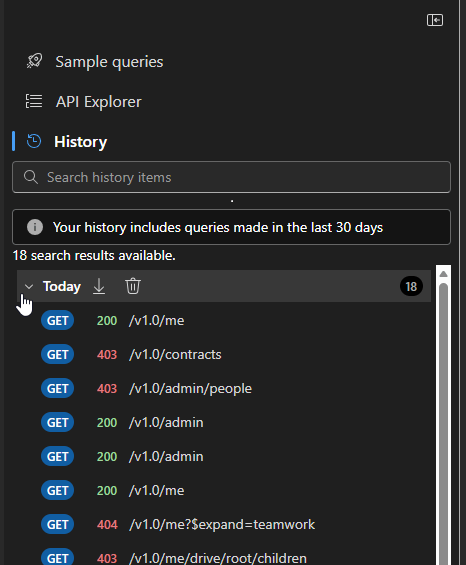
- HISTORY
All queries you run in Graph Explorer are saved for 30 days in the History tab. Here we can export all items, delete, run a query etc.
QUERY PANE
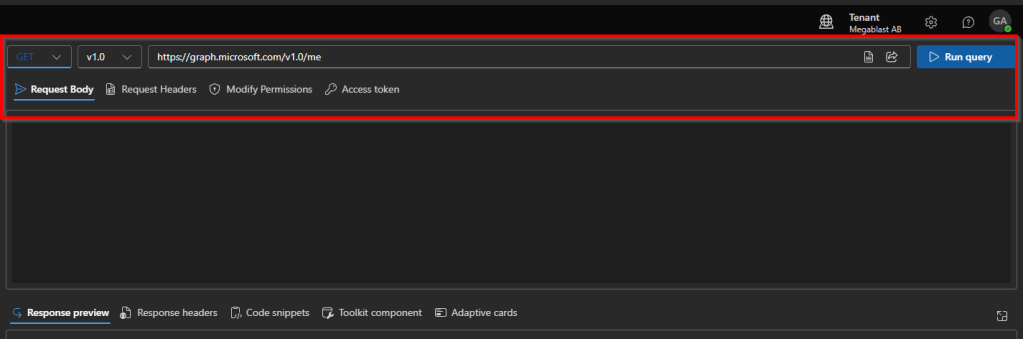
The Query area in Graph Explorer is where you build, customize, run your API requests, and view the responses. It consists of several key elements:
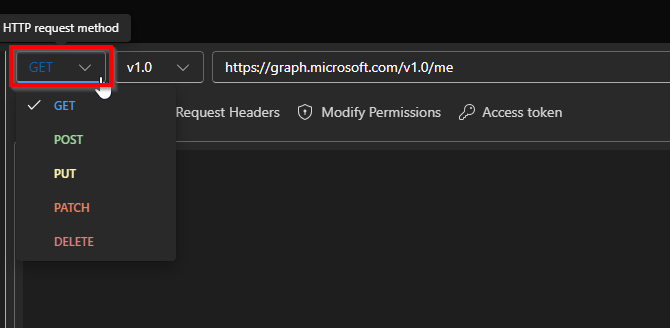
- HTTP methods: The HTTP methods dropdown in Graph Explorer lets you choose the type of request you want to send to Microsoft Graph. Each method determines how the API interacts with the resource you’re targeting.
- GET –> Retrieves data from a resource. It is like PowerShell Get- command that only fetch information without changing it.
- POST –> Creates a new resource or triggers an action. It matches Powersehell New- command that add a new object.
- PUT –> Replaces an entire resource with the data provided. Can be similar to a full Set- operation that overwrites an object.
- PATCH –> Updates an existing resource with new values. In powershell we use Set- command to modify existing object.
- DELETE –> Removes a resource. In Powershell we use Remove- command to remove object.
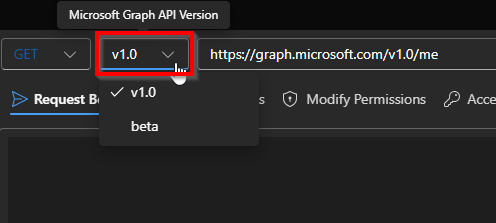
- API Version: The API version drop-down lets you choose which Microsoft Graph API version to query, either v1.0 or Beta. Selecting Beta version will give you much more information. Part two of this series will show us how these two differ and when to use each.
- Query box: A bar where you can manually build your query, or see the auto-populated query if you selected one from the left pane (t ex Sample Queries).
- Request body: The Request body is where you send data to Microsoft Graph when you’re asking it to create, update, or perform an action. For example if you’re creating a user, Graph needs to know things like name, email, password — that information goes in the request body.
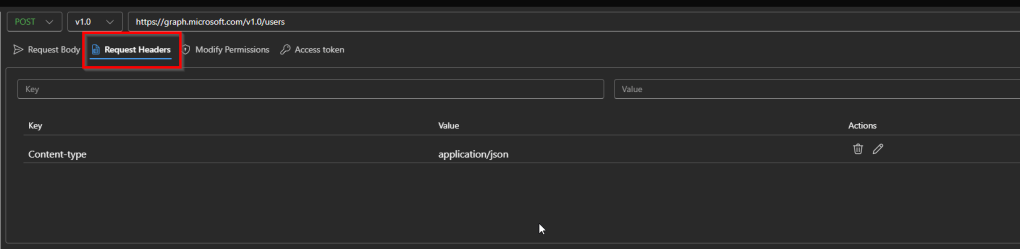
- Request headers: Request headers are extra instructions you send along with your request that tell Microsoft Graph how to understand, authorize, or process what you’re asking for. So if the request body is where we add info about for ex new user (JSON format) the request headers carry rules (messages that contain instructions or conditions) for how to read that data. In this case:
- Key: Content-type –> The format of the content I’m sending
- Value: Application/json –> The content is JSON (key–value pairs, curly braces, quotes, etc.)
Together, these two mean that the request body should be read using JSON rules
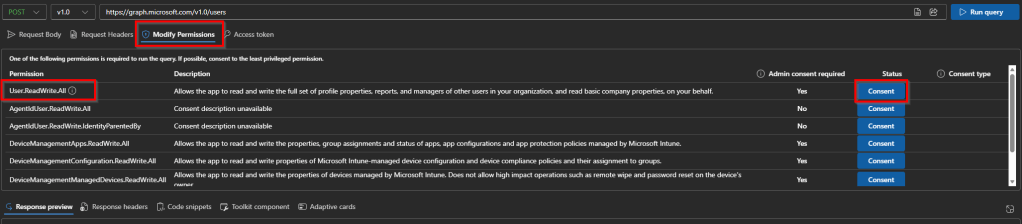
- Modify permissions: When you use graph explorer (or any app calling Microsoft Graph), Graph doesn’t just let anyone do anything. It checks who you are and what you are allowed to do. Because some operations are sensitive like reading emails or accesing files, before graph lets your query run, you must give permission. So this section lets you see all the permissions Graph Explorer can request and shows whether each one needs admin approval. You can review the list, check which permissions are already granted, and click the blue “Consent” button to approve any you need. Once consented, you can run queries that require those permissions without getting blocked.
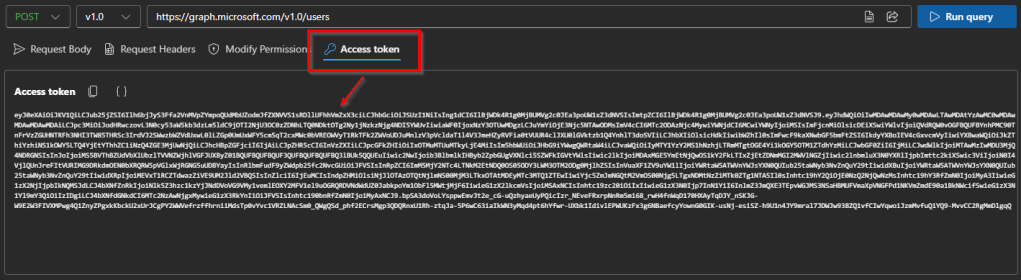
- Access Token: The Access Token tab shows your temporary key that lets Microsoft Graph know who you are and what you’re allowed to do. You can copy this token and use it in other tools (like Postman or your own app) to make Graph API requests without signing in again.
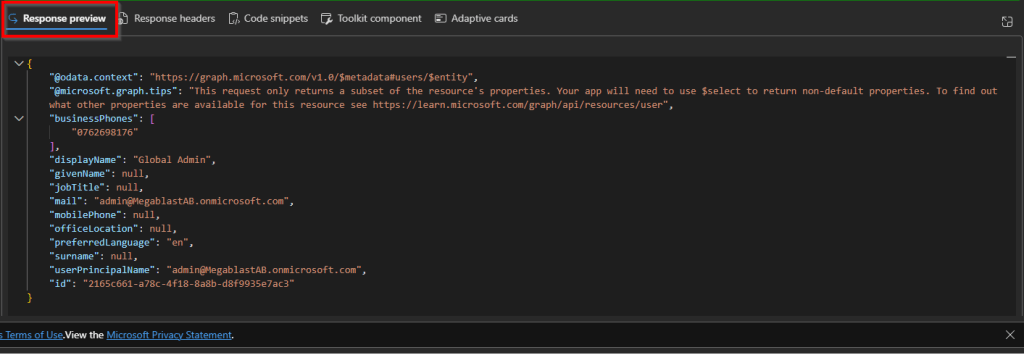
- Response Preview: this section shows the results returned by Microsoft Graph after you run a query. It lets you quickly see whether your request worked and review the data or errors that came back from the API.
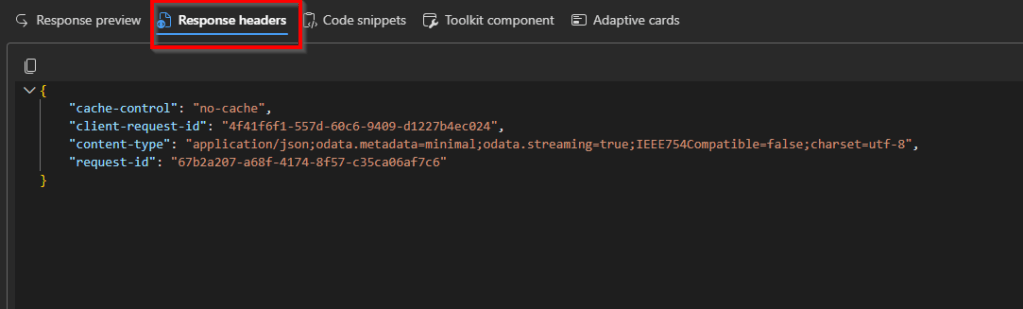
- Response Headers: this section shows extra details about the request, such as status codes, request IDs, throttling info, and other metadata returned by Microsoft Graph. This helps you understand how the request was processed and troubleshoot issues beyond just the response body.
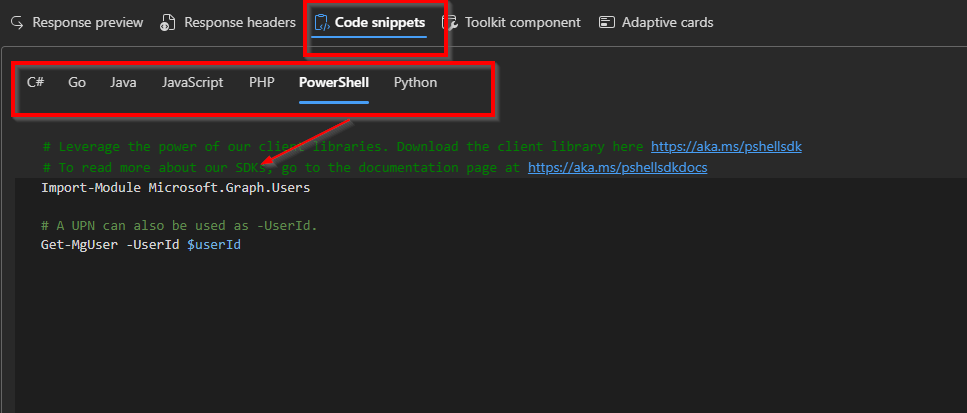
- Code snippets: This is really useful section because it shows us ready-to-use examples of the same request in different programming languages. It helps you quickly copy the request into your own app and see how to call the Graph API without having to write the code from scratch.
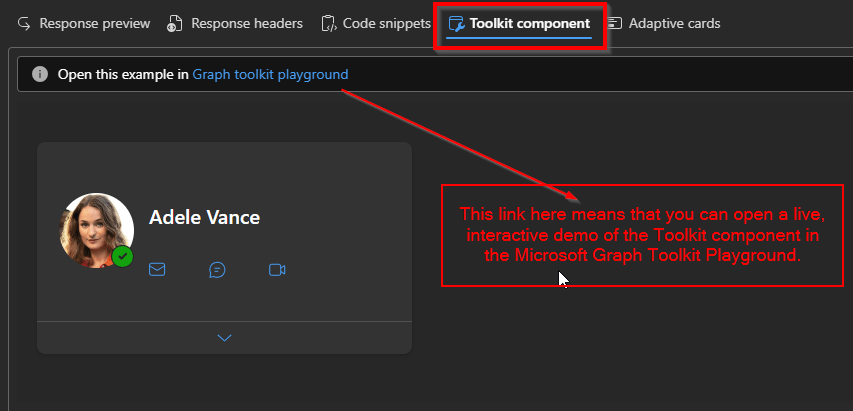
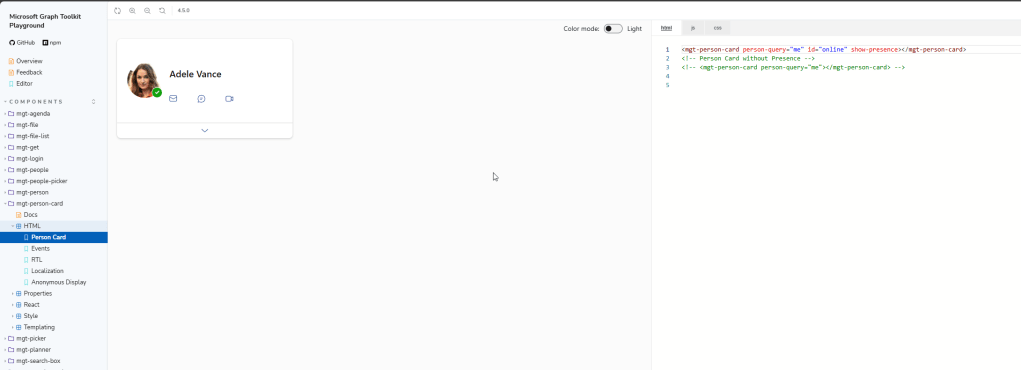
Toolkit Components: They are prebuilt UI pieces (like a user profile card, people picker, or task list) that already know how to talk to Microsoft Graph. Instead of writing API calls, handling sign-in, and building the UI yourself, the component does it for you. You add a Toolkit component to your app (usually as an HTML tag), sign in once, and the component automatically fetches and displays data from Microsoft Graph. For ex Person component can automatically show a user’s name and photo without you writing any API code.
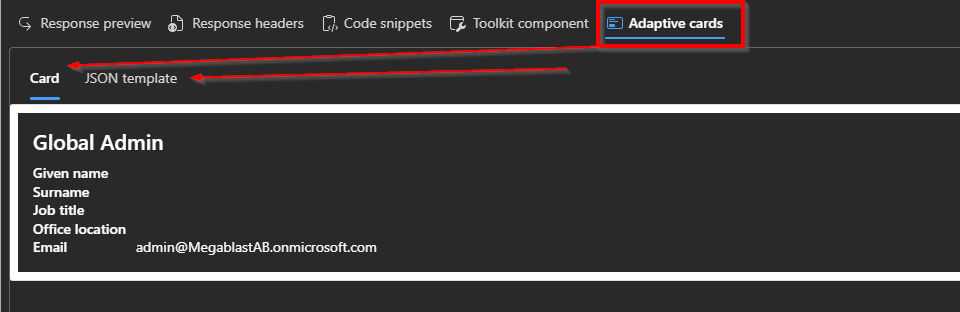
- Adaptive cards: are small pieces of user interface that are written in JSON. They can be displayed in different apps or services—like Teams, Outlook, or your own web app—without needing to rewrite the UI for each platform. Basically, Adaptive Cards let you turn API data into a visual card that works across many Microsoft apps.
That wraps up our first look at Microsoft Graph Explorer! We’ve explored the layout, understood what each section does and got a feel for how this powerful tool helps us interact with Microsoft Graph without writing a single line of code.
In the next part of this series, we’ll roll up our sleeves and start working directly with Graph, exploring real data, crafting custom queries, and seeing how we can leverage the full power of Microsoft Graph in practice. If today was about learning the map, the next post will be about taking the journey.
Stay tuned!


Leave a comment