In this part we will move forward with DHCP configuration. Once we have a DHCP server installed we can create scopes.
Scopes – are collections of IP addresses, subnet masks, and additional configuration options that a DHCP server is authorized to distribute to clients. A DHCP server can have multiple scopes configured, allowing it to support different networks within a corporate environment. In fact, it is common to create a separate scope for each network.
For a DHCP server to function and issue IP addresses, at least one scope must be configured and active.
Split-Scope – is a simple method for providing DHCP redundancy and load balancing within a network. By dividing the available IP address range between multiple DHCP servers, it helps ensure continued address availability if one server becomes unavailable.
Superscopes – allow you to combine multiple DHCP scopes into a single, larger pool of IP addresses that can be assigned to clients. This provides a broader range of available addresses for incoming devices.
Superscopes are typically used in environments where the configured subnet mask does not provide enough usable IP addresses for a specific location. This situation commonly occurs with a 24-bit subnet mask (255.255.255.0), which allows for only 254 usable addresses. In such cases, organizations may exhaust the available address space, making superscopes a practical solution.
Multicast Scopes – are used far less frequently than standard scopes or superscopes. Multicasting refers to the process of sending data to a group of recipients simultaneously, rather than sending data to a single recipient, which is known as unicasting.
Once a multicast scope (MCS) is configured and assigned a multicast group address, any multicast-enabled clients that have registered with the MCS can receive data streams sent to that address. By registering with the multicast scope, clients are able to participate efficiently in multicast communications, such as real-time video or audio streaming over the network.
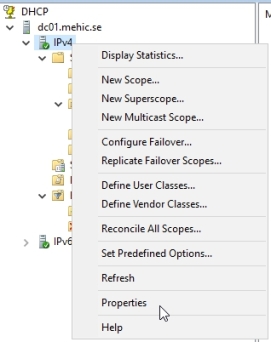
First of all lets right-click on DHCP server and see the options

When you right-click on DHCP server you will be able to backup this database, the database where all of this information that you’re configuring is being stored, and you can also restore it and I want to show you where that is. If I go to Properties it tells you the location that’s currently defined and it’s Windows\system32 dhcp, and when you run a backup it’s in DHCP backup.

Well I navigated out to that just so I could show you what it looks like. Here’s where the database and the log files are for DHCP, this database holding all of this, and here’s where the backup will be located

Now I want to create a scope and let’s do one for IPv4, so I’m going to expand IPv4 and you’ll see a variety of options. I’ve got Server Options, Policies, Filters, but when I right- click on IPv4, this is where it says, oh, you want to add a scope, so go ahead and add one.

Welcome wizard will pop-up. Click Next
On Scope Name, give you scope a name and click next

On this page we need to give it a start and end range of addresses that we want this scope to be able to issue out. It will measure out all of the IP addresses within that range. Now at the bottom here we need to specify what the subnet mask is going to be for these IP addresses and it’s already setup as a /24, verify that it’s all correct, and then click Next.

Add Exclusions and Delay Wizard, allows you to fine-tune how IP addresses are assigned within a scope
Exclusions define specific IP addresses or ranges within the scope that should not be issued to clients. For example, you may choose to exclude addresses from 100 to 102 because they are reserved for other devices on the network. Instead of creating multiple scopes, exclusions provide a simple way to reserve addresses while keeping the scope intact.
You can also configure a subnet delay for IP address ranges. The delay instructs the DHCP server to wait for a specified amount of time before sending DHCP offer messages. This is useful in environments with multiple DHCP servers, where you may want a different server to respond to client requests first.
Click Next

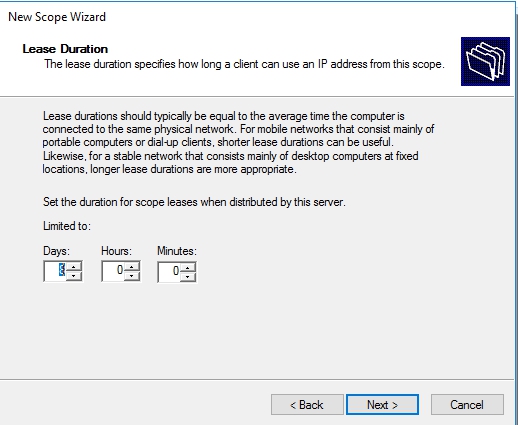
On Lease Duration page, you can configure how long an IP address is leased to a client. By default, the lease duration is set to 8 days.
In stable network environments—where most clients remain connected for long periods and do not move frequently—you may choose to increase the lease duration. This reduces the frequency of lease renewals and minimizes network overhead.
Conversely, in environments where clients frequently connect and disconnect, such as service provider networks, a shorter lease duration is more appropriate. Shorter leases ensure that IP addresses are quickly reclaimed and made available for other clients.
I’m going to go ahead and leave it at 8 days and hit Next.
On Configre DHCP Options page, you can set additional DHCP configuration options. Up to this point, only the IP address range and subnet mask have been defined. Other important network settings such as the default gateway, DNS servers, or even a WINS server (if one is still in use) have not yet been configured.
These additional options can be configured at this stage to ensure clients receive all necessary network configuration information automatically.
Click Next

On Router (Default Gateway) page, add you gateway and click next

Domain Name and DNS page, Under normal circumstances the wizard will detect the DNS server that is installed during the installation of the domain.Click Next

WINS Server page, I don’t have WINS so I will click Next

On Activate Scope page, click Next and Finish

That’s it.

You’ll notice that underneath the scope I have the address pool and this shows me the address pools and exclusions that I just setup

I can see the current leases. Now there hasn’t been anything leased because we haven’t tested this yet, but this is where the leases will be displayed

Reservations – provide a way to ensure that a specific device always receives the same IP address from the DHCP server. This differs from statically assigning an IP address directly on the device, which can be difficult to manage, especially on servers and network devices.
By creating a DHCP reservation, the server guarantees that the designated device will always be assigned the same IP address while still being managed centrally through DHCP.
Right-Click on Reservations and select New Reservation

Give your reservation a name and then the IP address that we want this to have. Now the additional information that we need is the MAC address for my client. Click Add

When we click Close we’ll see that we now have a reservation for Admin PC

I’m now always going to get the same IP address, which is very useful for both servers and for other devices or clients that must have a specific IP address.
Scope Options VS Server Options
Scope Options -> When you configure this, changes will apply only to this scope
Server Options -> When you configure this, changes will apply to all scopes you have. Now this is not a good place to put in a default gateway. If you have two different networks, they’re going to have two different default gateways, but this is a good place to put in a DNS server that maybe everybody from both those networks is going to use.
DHCP Polices -> policies are a mechanism to allow you to determine for specific types of equipment coming in that correspond to different characteristics, what kinds of DHCP options will those machines actually get. An enterprise network has several types of devices – desktops, printers, mobiles, laptops etc. An enterprise administrator would need to ensure that all these different types of device are provisioned appropriately for network connectivity. You want different types of clients to get IP addresses from different IP address ranges within the subnet. By specifying a different IP address range for different device types, you can more easily identify and manage devices on the network.
DHCP Filters -> Filters are a mechanism for allowing you to deny entirely, or to allow entirely machines from actually receiving DHCP services. It’s best, it’s probably easiest actually to take a look at the Deny Filter here,


where you literally just punch in a Mac address, and a Description, and this client will not receive DHCP services. On the opposite side, with an Allow Filter, the Allow Filter says, yes, this machine will receive DHCP services.
This is sort of a master toggle switch for any DHCP services at all, and if you plan on using filters, one of the things you’ll have to do up here on the protocol, the Properties of the protocol,

is actually configure which filters you’re going to use, so to enable the Allow list, or to enable the Deny list. Turning these on means that you’re going to have to populate that list with back addresses for any of those you want to Allow, or Deny services. You can also setup advanced filter properties here

for hardware types that are completely exempted from filtering. So, this gives you the ability to really kind of discretely tie down to very specific Mac addresses that you want to communicate with you DHCP server.
What we covered in this part.
- What is scope and how to configure it
- What is DHCP Reservation
- Difference between Scope and Server options
- What are DHCP Polices
- What are DHCP filters
That’s it. In Part 3 we will configure SuperScope, Split-Scope and see how we can configure DHCP Failover.
Cheers,
Nedim


Leave a comment