Windows Server Backup is a solution, it’s essentially a feature that you can install onto any machine, that provides a set of wizards and other tools for you to perform basic backup and recovery tasks for the server it is installed on. The Windows Server Backup of today supports a much larger set of use cases than the old versions. You can back up an individual file or folder, but really Windows Server Backup was designed and continues to be designed around the entire volume backup with the whole point being that we can bring that entire machine back online, even from bare metal if we need to.
Installation is very simple.
Open Server Manager –> Manage –> Add Roles and Features

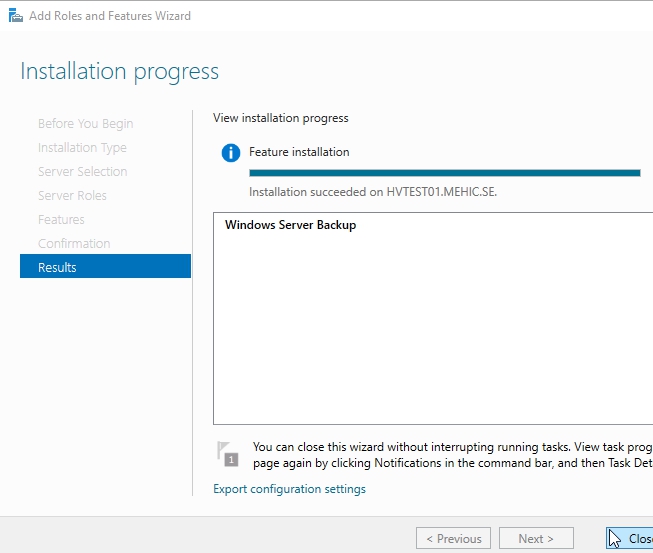
Before you begin page will pop-up. Walk through the wizard accepting the defaults until you come to the Select Features page. Scroll down and select Windows Server Backup Feature and click next and Install

Once done click Close
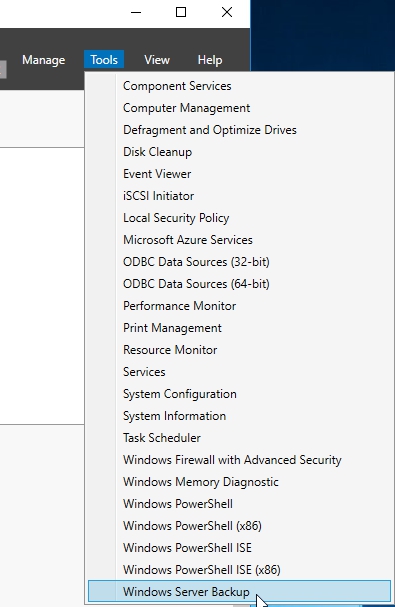
Once installed, you can launch it from Server Manager –> Tools –> Windows Server Backup.
That will open Windows Server Backup Console
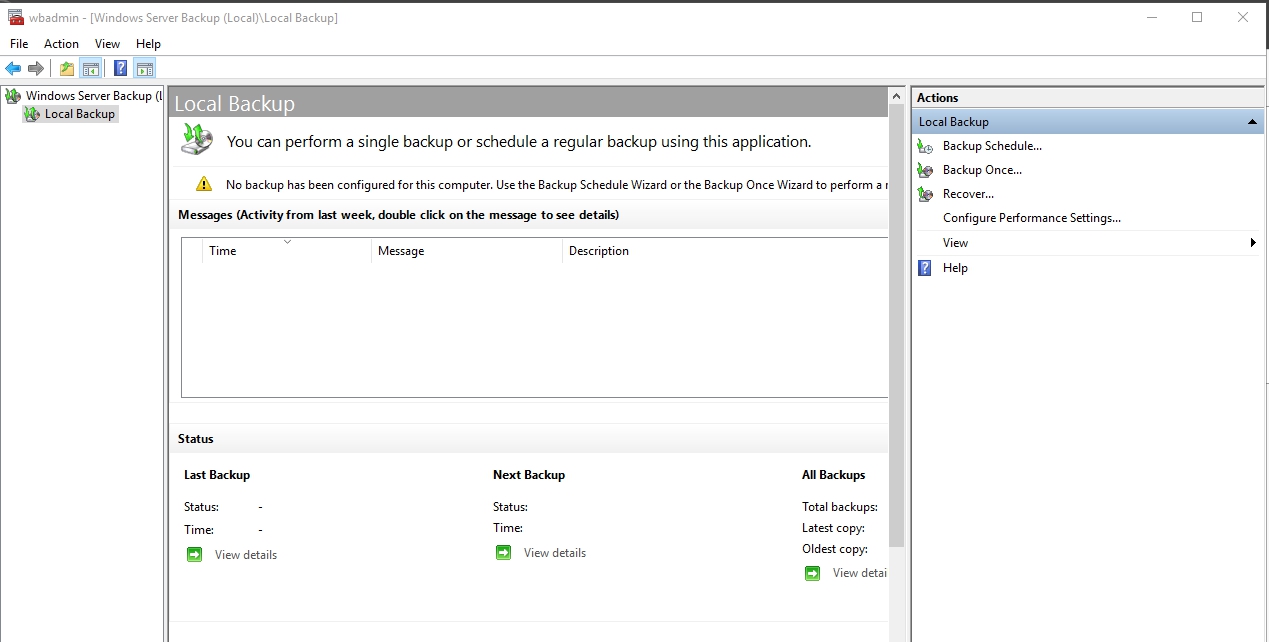
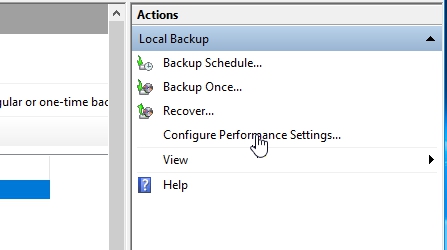
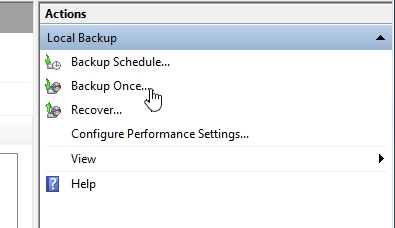
Under the Actions –> Click on Backup Once…

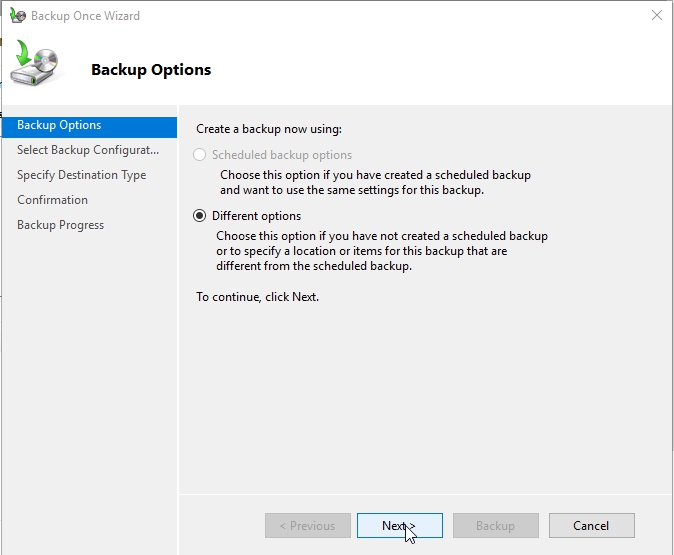
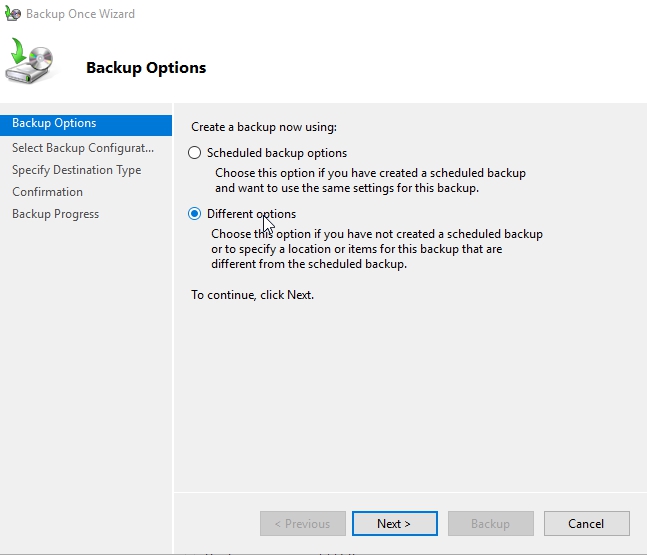
On Backup Options page, our only option is Different options. Click Next
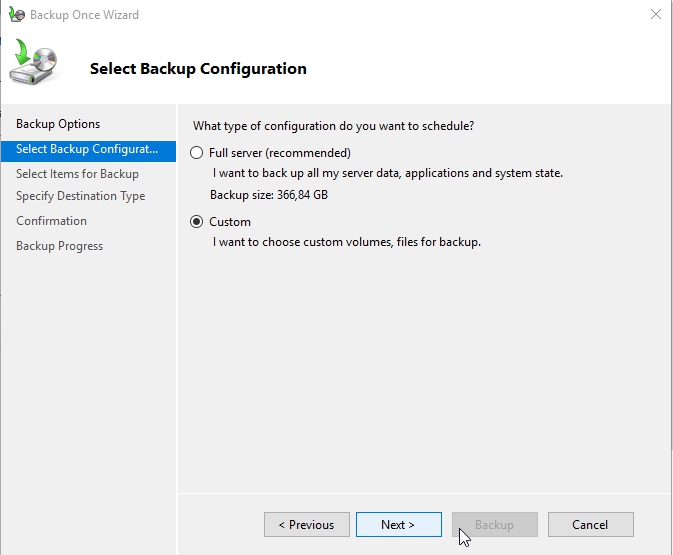
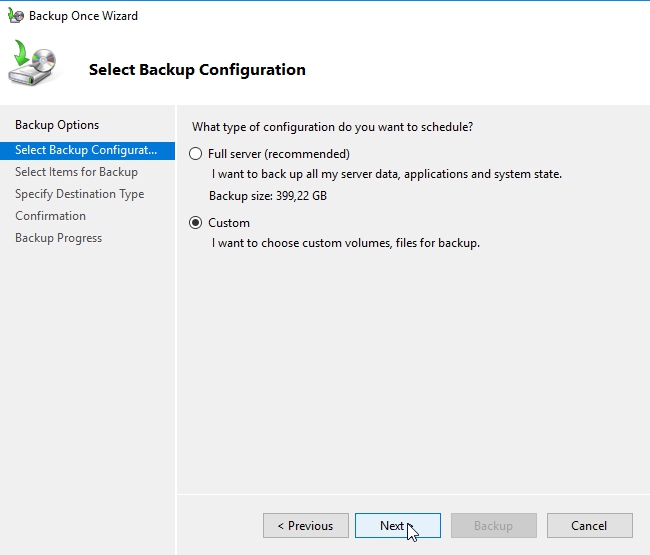
Select Backup Configuration page, Here we have the option to back up the entire server, so the full server, or custom volumes and files for backup. This is what makes Windows Server Backup a little more usable I think in a lot of environments today. I will choose Custom to explore other settings, once done click next
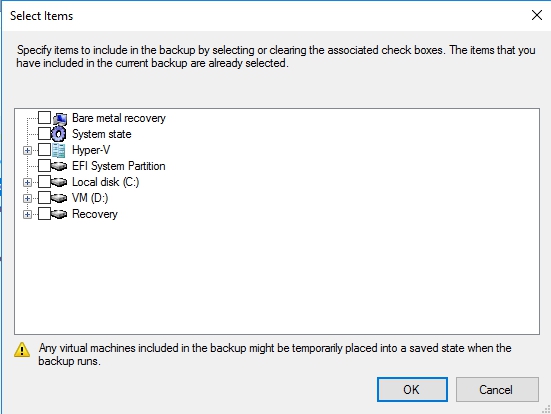
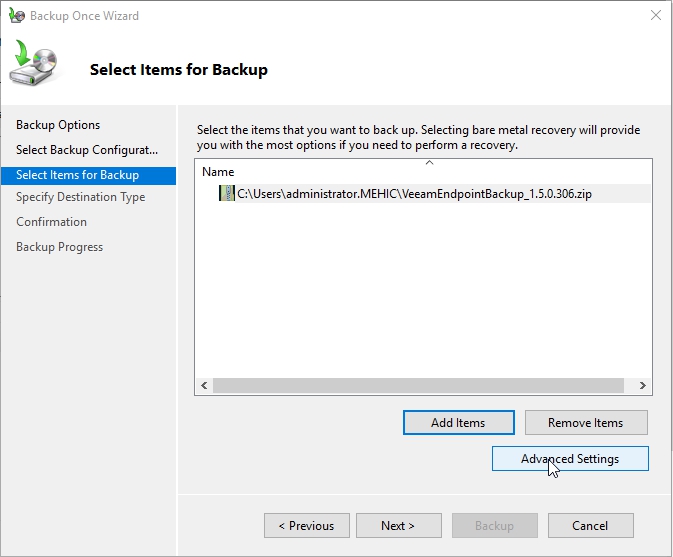
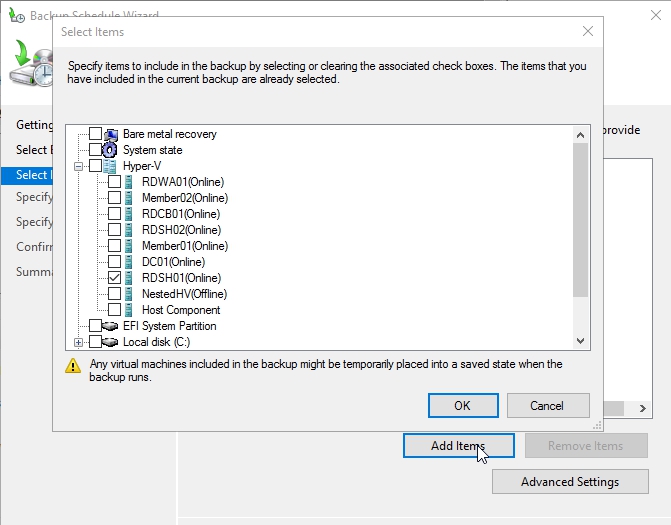
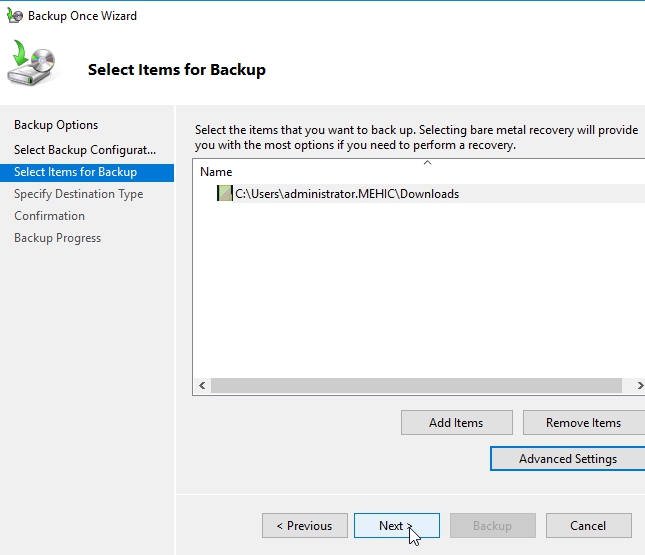
Select Items for backup page, Click Add Items –> When we choose to select our items for backup, you’ll see here we have a list of just the volumes that are associated with this machine, like the C drive and the D drive. We also have some special volumes here like our system reserved drive, which includes our boot information and our recovery information, as well as a system state and our bare metal recovery item here. We have also Hyper-V (you will have this if Hyper-V role is installed on the server). Choose what to backup and click OK. (I will take backup on VMs in a different backup job)
Before you click next, click on Advanced Settings
Here under the advanced settings we can go through configuring just a couple of extra things for what we want to get out of that backup, not the least of which are a set of excluded files that we want to remove out of the backup entirely. You can imagine if you’ve got a file server and for some reason or another you’ve got a bunch of MP3 file that you don’t want on that backup, well, you just add them here as an excluded file type. You can select the items to exclude and just drop down to figure out exactly what you’re looking to get rid of from the backup.
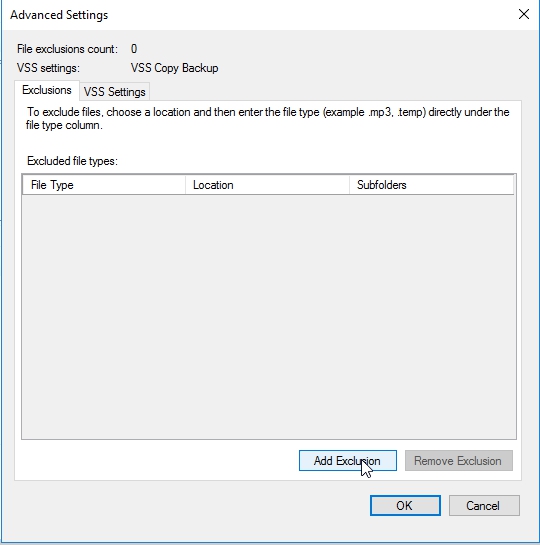
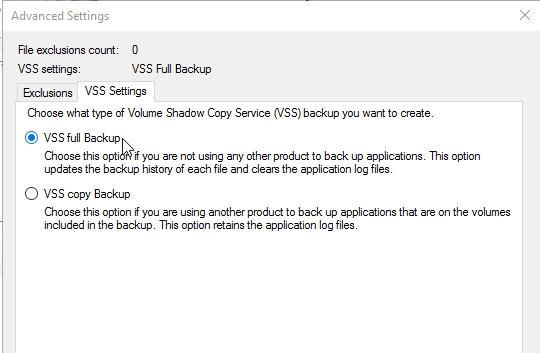
More important here than the exclusions is this item here titled VSS settings. These VSS settings have mostly to do with whether or not you are using another solution in addition to Windows Server Backup in order to back up your applications. So you’ll see here that for the VSS full backup, you use this option if you’re not using any other backup or any other product to back up applications because that selection is going to update the backup history of each file and clear the log files. Second option (VSS COPY BACKUP), however, if you are using another product, well then you’ll use a VSS copy backup, which retains those application log files, so just be aware if you’re using some Enterprise solution and you want to do a Windows Server Backup, this is the default setting here for the VSS copy backup, so just be cautious of this if you plan on doing a Windows Server Backup in addition to the solution that you may have. I am not using any other solution so I will select VSS full backup. Click OK and Next
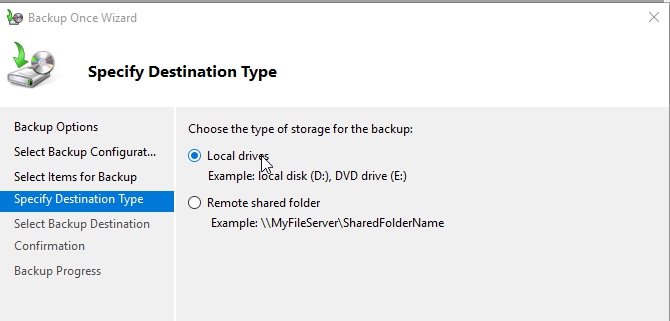
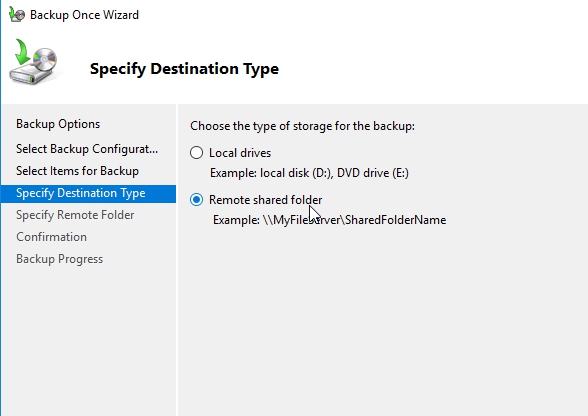
Specify Destination Type page – Here we can identify where we want to put this content. We can either put it on our local drive, so as I said before, any volume-oriented approach, Windows Server Backup is really looking for a directly attached volume to store this content and in fact if you choose a local volume, it will find a volume for you to use, or you can choose a remote shared folder if you want and specify what that folder would be. If we were to choose a local drive, so the D drive for example, this would be the location where the backup would go and it would also be the location where further backups would go if this were a more scheduled backup. Click Next
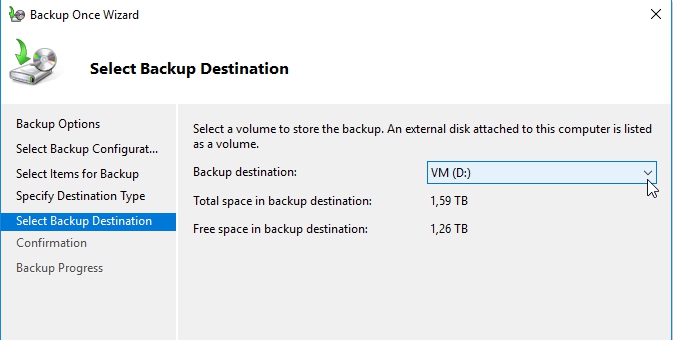
Choose the Drive and click next
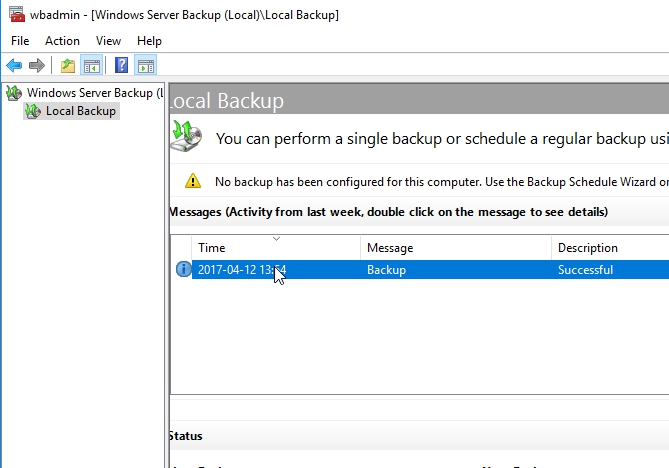
On Confirmation page click Backup and that’s it.
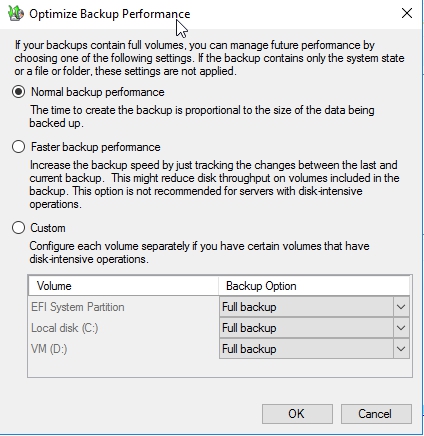
I have to assume that you’ve got some familiarity with the different kinds of backup approaches that exist today like differential or incremental backups. The way those are manifested here in Windows Server Backup is through window called Optimize backup Performance which you can access from Actions Pane –> Configure Performance Settings
So what we’re talking about here is whether or not we are using a regular full backup here under normal backup, or what is essentially an incremental backup. This second option, backups that run after the initial backup are just deltas between the initial backup or I should say the last backup and the current backup. Now they call this faster performance because you’re not having to go through backing up the entire server, but arguably this probably should be something more like full backup and incremental backup as opposed to focusing on performance. You can also go down under custom and identify for each different volume that you would choose, whether you would choose a full backup or an incremental backup.
That’s it. Let’s create a new backup job (Scheduled this time) and take a backup on Hyper-V VM.
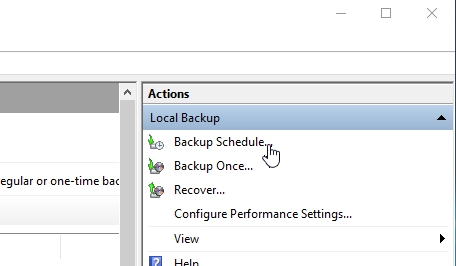
In Windows Server Backup Console click on Backup Schedule...
Getting Started Wizard will pop-up. Click Next. On Select Backup Configuration page, select Custom and click Next

Select Items for backup page –> Click Add Items and add one VM. Click OK (If you don’t see Hyper-V you will need to install Hyper-V role on the server). I also went under Advanced Settings –> VSS Settings and selected VSS Full backup.
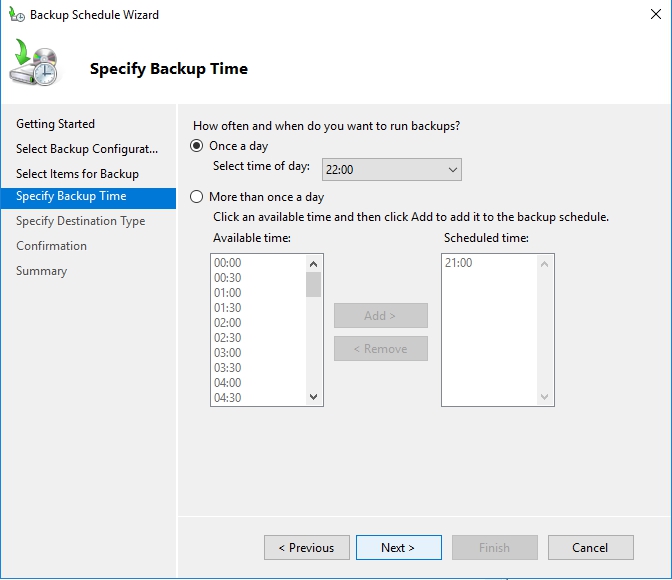
Specify Backup Time page, here we can specify if we are going to take backup once a day or multiple times. Once done, click next
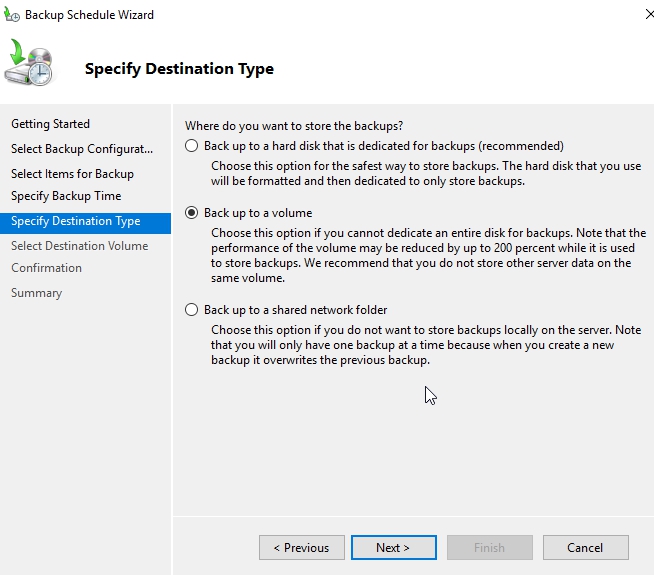
Specify Destination Type page options:
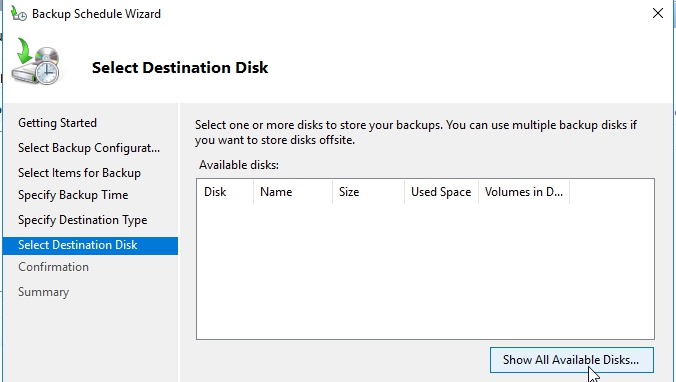
- Back up to a hard disk that is dedicated for backups (recommended) – Choose this option if you have external disks that can be used for moving backups offsite for disaster protection. If the list is empty, or the disk that you want to use is not listed, click Show All Available Disks .
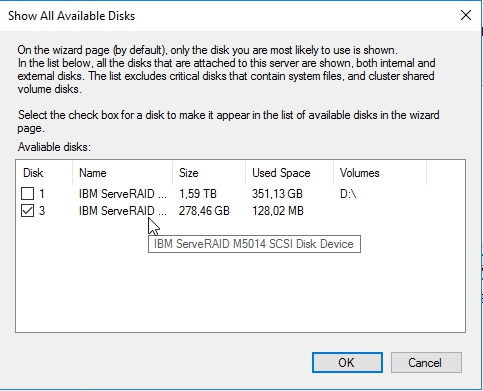
In Show All Available Disks , select the check box next to the disk that you want to use to store the backups, click OK
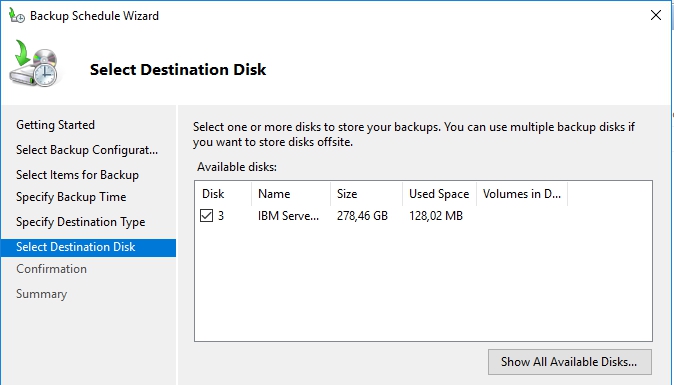
and then on Select Destination Disk , select the check box for the disk again. This disk will no longer be visible in Windows Explorer—to prevent data from accidentally being stored on the drive and then overwritten, and to prevent accidental loss of backups.
- Backup to a volume –> Choose this option if you want to save backup on drives that are on the server.
- Back up to a shared network folder – choose this option if you want to save backups on shared folder. Disadvantage with this is every new backup will erase the previous one and only the latest backup will be available.
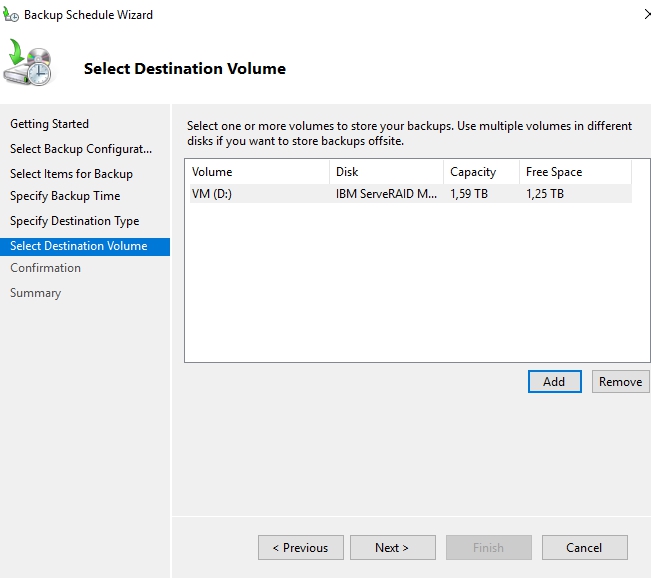
Select Destination Volume page –> Add the drive where you want to save backup and click next
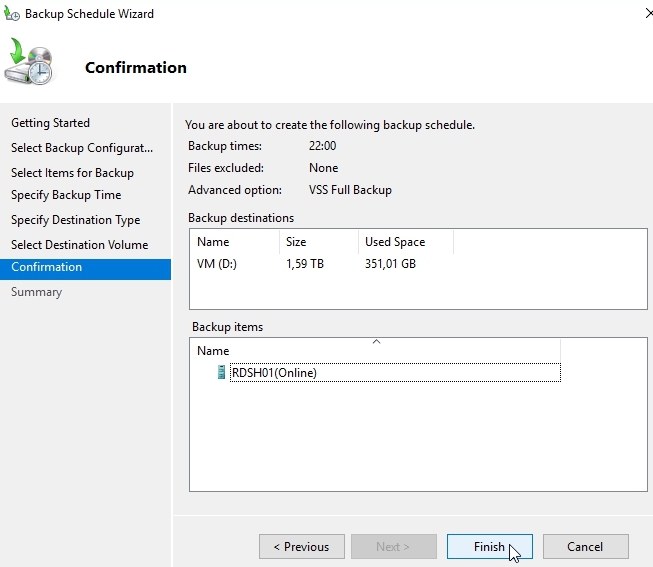
Confirmation page –> Click Finish
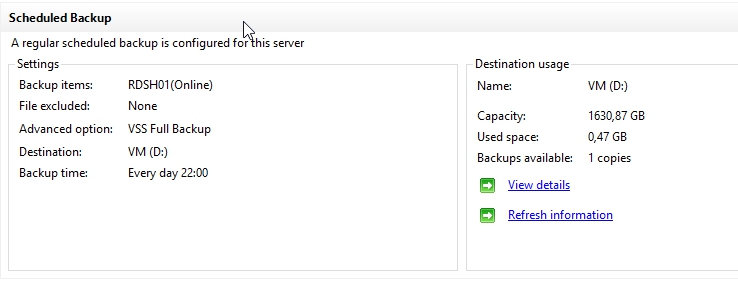
Our Scheduled backup can be find under Schedule backup
Let’s create a new backup and save it on a network folder. One more time click on Backup Once…
Backup Options page, Select the Different Options, click next
On Select Backup Configuration page select Custom and click Next
On Select Items for backup page, click on Add Items and add items you would like to backup. Once done, click on Advanced Settings and on the VSS Settings tab, select either VSS full Backup or VSS copy Backup. Click OK and Next
This time choose Remote Shared Folder and click Next
Specify Remote Folder page, type the path to the folder. In this folder, a folder named WindowsImageBackup will be created.
Access Control:
- Do not inherit –> Choose this if you want the backup to be accessible only for the user credentials used to create the backup, and then click Next. Type a user name and password for a user account that has write permissions on the computer that is hosting the remote folder, and then click OK.
- Inherit –-> Select this if you want the backup to be accessible to everyone who has access to the remote shared folder, and then click Next.

On Confirmation Page click Backup and that’s it. If you browse to the location you will see folder WindowsImageBackup within shared folder.
In Part 2 we will take a look at Windows Server Backup and Azure Configuration.
Cheers,
Nedim


Leave a comment