Part 2 of Install and Configure Windows Server Backup 2016 is focusing on Azure. Now whereas Windows Server Backup is evolving to become a solution that can support a variety of restore use cases like individual files and folders and applications and full server backups, the Azure Backup Solution is one that’s really kind of designed more for just getting a copy of your data up into the Cloud.
I have account in Windows Azure and I want to show you how you would go about configuring Azure Backups and the way you get there is to go to AZURE PORTAL and then log in with your account. If you don’t have Azure Account you can create one and activate trial.
Now Azure Backups start with the creation of backup vault. A Recovery Services vault is an entity that stores all the backups and recovery points you create over time. So that is the first step we need to do. In order to create a backup vault you will need to click on More Services and in the list of resources type in for example recovery and click Recovery Services vaults.

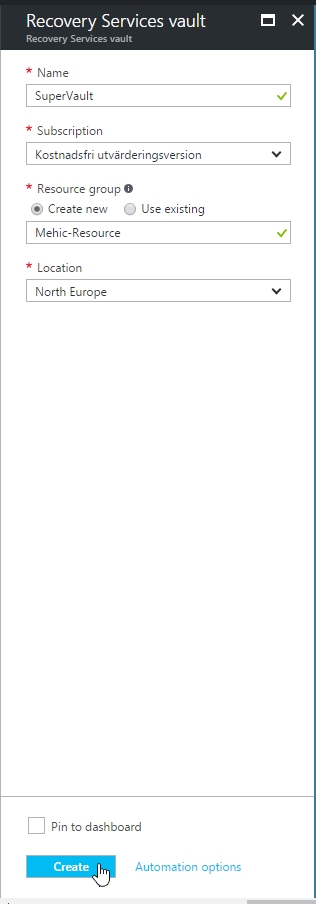
On the Recovery Services vaults menu, click Add. The Recovery Services vault blade opens, prompting you to provide a Name, Subscription, Resource group, and Location. Once done, at the bottom of the Recovery Services vault blade, click Create.
It can take several minutes for the Recovery Services vault to be created so be patient. Once your vault is created, it appears in the list of Recovery Services vaults. If after several minutes you don’t see your vault, click Refresh.

Now once you create the vault, you’ve got a couple of steps that you have to do. Click on the Vault. When you select the vault, the Recovery Services vault blade narrows, and the Settings blade (which has the name of the vault at the top) and the vault details blade open.

In the Backup Infrastructure blade, Under Manage –< click Backup Configuration to open the Backup Configuration blade and then click on Backup Configuration.

Choose the appropriate storage replication option for your vault.
By default, your vault has Geo-redundant storage. If you use Azure as a primary backup storage endpoint, continue to use Geo-redundant. If you don’t use Azure as a primary backup storage endpoint, then choose Locally-redundant, which reduces the Azure storage costs.
Don’t forget to click on Save.

Our next step is to configure the vault. So click on Backup (Under Getting Started section). First step is to select Backup Goal.
- Where is your workload running? I choose On-premises because my Windows Server is a physical machine that is not in Azure.
- What do you want to backup? Here you choose what type of files you want to send to the Azure. I choose Files and Folders.
Once done, click on OK

Next step is to download Agent for Windows Server. If you are using Essentials select second option. When you download it you don’t need to install the agent yet. You can install the agent after you have downloaded the vault credentials which is our next step.

The vault credentials are essentially a little file that you’ll download to some available location that is a time bombed file. You can think of this as a certificate just in the classic sense. These vault credentials are what you’ll use when you actually go about installing and then doing the initial configuration and registration of Windows Azure Backup.
Once done, click OK 2 times.

Now we are ready to install the agent. Double-click on MARSagentinstaller.exe.
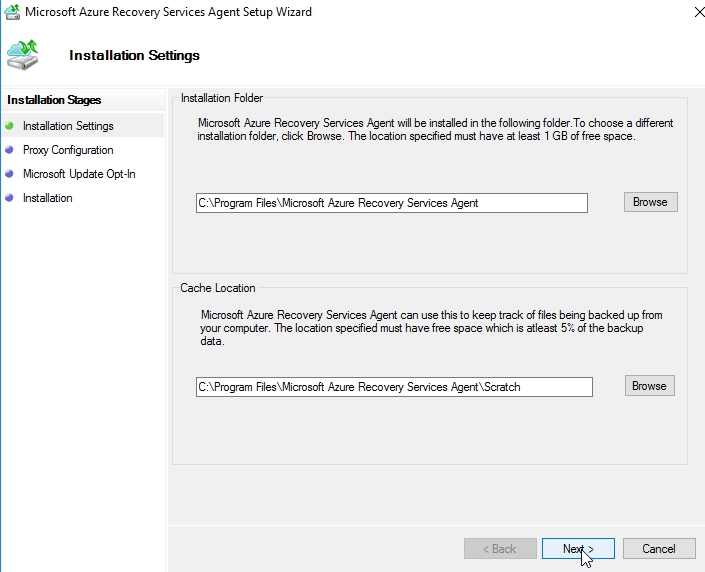
Installation Settings Page –> Here we need to choose a location for the installation and cache folder. I will accept the defaults. Click Next
Proxy Configuration Page –> Accept the defaults or click on Use custome proxy if you have it. Click Next

Microsoft Update Opt-In page, Click on Use Microsoft Update when… click next

Installation –> Click Install to install the agent

Once done, click on Proceed to Registration. You will also see a new icon on your desktop Microsoft Azure Backup.


When you click on Proceed to registration , new window will pop-up Vault Identification.
The biggest thing here is to actually go to your credentials, which is the file that we just downloaded onto desktop and use that as the mechanism to create that connection. Browse to the Vault Credentials file and add it. Once done, click next

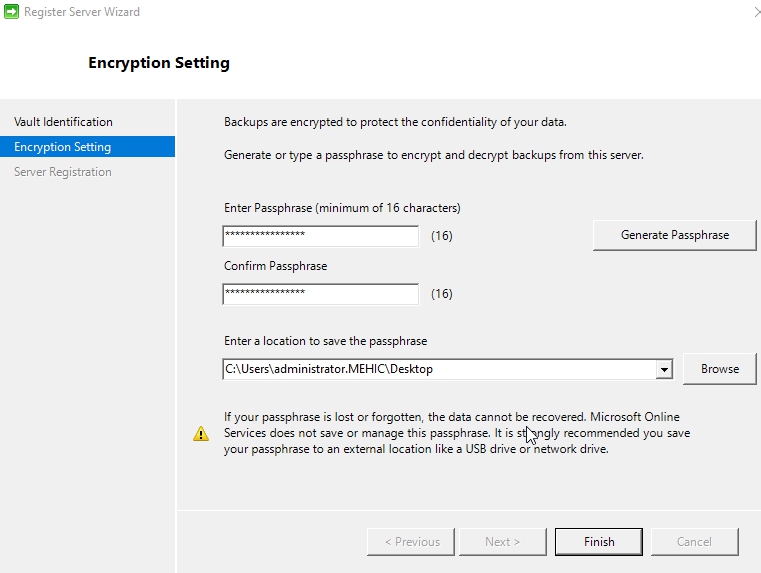
Here I can set up the encryption setting. Now very, very important here to recognize is that Microsoft is not in the business, or asserts that they are not in the business of wanting to know anything about the data that you put in their Cloud and one of the mechanisms that they do that is by giving you a pass phrase here that you use in order to access your backups. This pass phrase, as you can see down here at the bottom, is something that even Microsoft does not know. Now that gives them deniability over the contents of the backup, it’s a process by which they can assert that they have no access to getting into it, and it’s also just a great thing for you to know that there is some separation between what you have and what Microsoft is hosting up in their Cloud. The issue with these pass phrases, however, is what you see down at the bottom, that if your pass phrase is lost or forgotten, your data is gone. There is no way, repeat no way, to get that data back, so when you go about generating those passwords, make sure you put that pass phrase in a location where you’re going to be able to find it so that you have it for later use. Again, there is no way to get that data back. Once done, click Finish
Click Close.

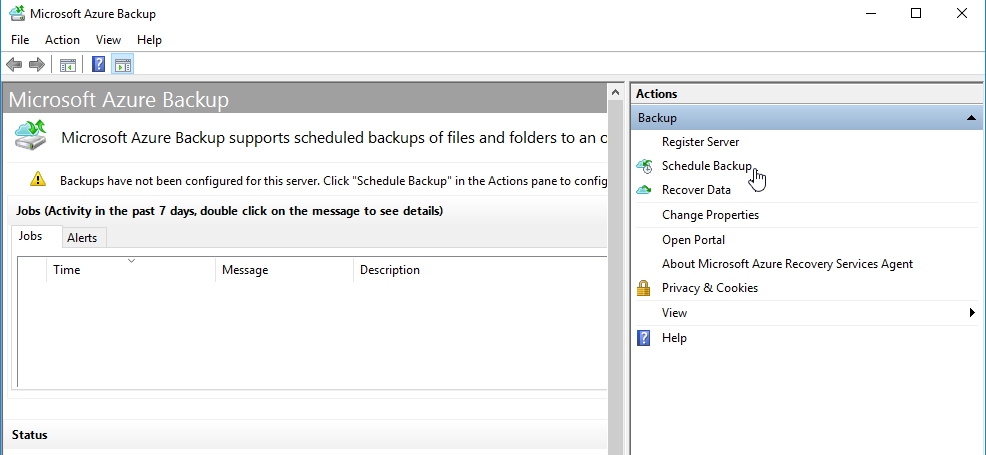
Once Azure Backup is registered here, which will take just a second or two, we’ll then have the ability to go about working with Azure to do all the usual things that you’re used to thinking of as far as backing up a server. I can choose here to schedule the backup.
I can change properties associated with this configuration.

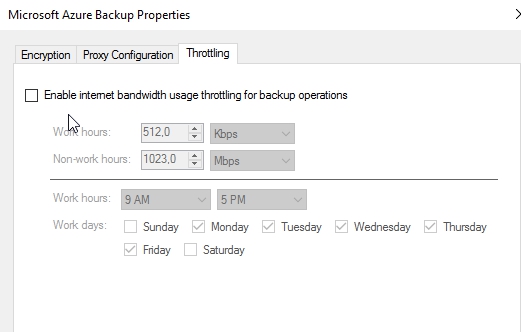
I could enable encryption here if I want, adjust the proxy configuration 
or even enable throttling, if I have a relatively slow or latent connection to the internet that I don’t want to consume too much when I’m actually going through these Azure backups.
Everything else here is relatively similar to what you would see in your standard Windows Server Backup solution. If you choose the schedule backup wizard here, you’ll notice that for the most part, actually things look almost the same between the two technologies. You would choose to add items just like you would before, but you are not going to have anything like a system state or a system reserve partition or a bare metal backup item here.

Similar exclusion settings here, but again, no VSS content here.

That’s it.
Thanks for reading!
Cheers,
Nedim


Leave a comment