We know that the big selling points of Windows Deployment Services or WDS is that number one it doesn’t cost extra money, it’s included in Windows Server, but number two it provides us with PXE boot and multicast technology. So WDS fits into any self respecting operating system or server deployment infrastructure. In this and in the next post we’ll talk about initial configuration, as well as the PXE stuff that you have to set up, that connects WDS with your DHCP services as well. We’ll then talk about configuring and managing boot, install and discover images. These are the different kinds of images that WDS could potentially use for booting a machine, for installing an operating system.
WDS is kind of the combination of a couple of different solutions all into one. We have to have WDS itself because that’s the tool where the images are stored. That’s the tool where the images are delivered from. But it’s also a way to get machines connected up to WDS and bootstrapped into that WinPE environment. So a large portion of this initial configuration is not only getting WDS up and running, getting the different kinds of images pulled into WDS, but also the connection over to our DHCP services as well so make sure that you have DHCP server up and running as well.
INFRASTRUCTURE
DC01 –> Domain Controller and DHCP
WDS –> WDS Server (Domain joined)
Our first step in deploying WDS is to go and install WDS role. You can use Server Manager to install it or you can run powershell as admin and type in
Install-WindowsFeature WDS -IncludeAllSubFeature -IncludeManagementTools
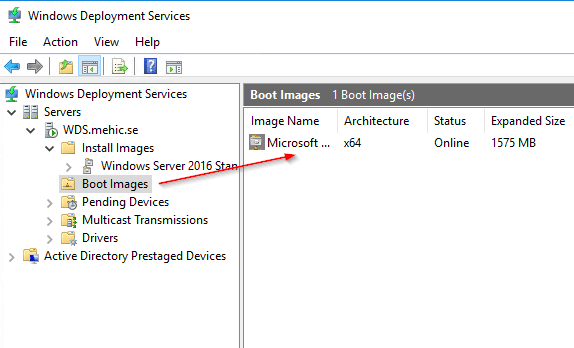
Once done type in WDSMGMT to open windows deployment services. (You can access it through Server Manager as well. Click on Tools –> Windows Deployment Services)
Our next step is to click on Servers and then in drop down, right-click on your server and click on Configure Server.

On Before you begin page click Next.
On the Install Options page we have to identify what kind of installation we want to do for this instance of WDS. Now, in a lot of environments where you’re deploying machines, and those machines are going to be on the same active directory domain as the WDS server, well, you can use integrated with active directory here. But there is also option to create a stand-alone server, which does not necessarily preclude you from automatically inserting these machines you’ll be provisioning into your active directory domain. Now, more often than not, a lot of people like to create a separate server that’s perhaps even on a separate network. A lot of times, the network team prefers to keep the kinds of multicast traffic that WDS can use for that activity away from the rest of the network. It can kind of oversaturate the network if it’s configured in the wrong way. And so, for that reason, you’ll see a lot of situations where stand-alone servers are configured that are disconnected from active directory. But later on, as we go through the configuration of these machines, you can tell the machine to connect to your active directory once it’s provisioned but for the sake of simplicity we’ll go through an integrated with active directory configuration here. It kind of makes a few items just a little bit simpler. Click Next

On Remote Installation Folder Location, here we can configure path to our remote installation folder. Now, I’ll put this on the C drive, but this can contain a lot of content, because you’re going to be putting operating system images on it, so make sure you have plenty of space in whatever this location is. You’ll get a little error message if you try to choose the system volume as opposed to a different volume.


Now, here we have the next option of determining how we want our PXE server to respond to incoming clients as they may attempt to request an image from our WDS solution. By default, we won’t actually respond to any client computers, or I could choose to respond to known or known and unknown client computers. Remember that any machine where in the BIOS, you’ve configured the network boot higher up in the boot order, any of those machines will attempt to connect to your PXE server first before any of the other boot options that exist. And so you have to kind of be careful with this configuration here. I tend to set mine to known and unknown but require administrator approval for the unknown computers. Once done click next

When you click next, it will then go through the initial configuration of Windows Deployment Services. We still have quite a few other configurations we’ve got to do for WDS to even function. The next step is to actually identify what kind of images we want to import here onto this server. For our purposes, there are actually two different kinds of images that we’re interested in, the first of which will be a boot image. This boot image will be that little micro version of windows, the Windows PE instance, that bootstraps the client to the point where it can then request the install image, which is the second type of image we’re going to import. These boot and install images are available on the windows iso. What I did is I unpacked the iso and copied it to C:\Windows Server 2016 Images\Unpacked. You will find boot.wim and install.wim in sources folder. (When you install windows server, in most cases, you will have 4 options (both full and core standard and datacenter edition. I removed all except standard core so I will only have 1 option to install)).

Click Finish

Here we need to provide the path to location where those 2 .wim files are


Image Group page, I’m going to create an image group called Windows Server 2016 Standard Core and choose Next.

Once I do that, you’ll see we found one image, as well as one boot image.

When we click next, it will then go through the process of adding both the boot image and the install image here to our Windows Deployment Services location.

Now, If you remember we had option to specify remote installation location which I chose to be C:\remote install, folder that we created as kind of the WDS working folder, where all of its content gets stored. One of the things that this process is doing is, it’s creating kind of a framework of different files that we’ll later be dropping content into.

Once done, We will see our boot and install images in our deployment. This is the copy of Windows that I’m going to later deploy out to a machine.

Then the boot image is what we use to actually boot that machine so that it could actually receive that copy of Windows. These two images in consort are what are necessary to get WDS to deploy an operating system out to an waiting client.

For us to get any further, we’ve got to go through a series of tabs here that are under the properties of our WDS server to configure it so that it behaves the way that we’re looking for. Let’s right-click on WDS server and select Properties, and you can see this long list of tabs here that I want to step through one at a time.

PXE Response –> the first is PXE response tab, which allows us to identify what the PXE response policy will be for this environment. I’m going to choose again the check box here to require administrator approval for any of those unknown computers that are coming in.
Delay in seconds –> if I have a couple of different PXE servers out there, I can choose to delay the PXE response so that clients would actually have the abilities to get their PXE response from some other server first. In most cases, you typically only have a single PXE server in an environment, so the configuration of a PXE response delay is not something you would necessarily do.

ADDS –> here we can configure the client naming policies or essentially how any unknown client computers are going to be named. In the next post , I will show you a much better way in which you can configure this client naming policy as opposed to just creating machines with a random computer name. Under computer account location is where we can identify where we want to create the computer accounts for the machines that we’re deploying. That will be in the same domain as our WDS server. That can be in the same domain as the user of the same organizational unit, or I can choose a specific organizational unit here in my domain. So, for example, the Windows Server 2016 organizational unit. This gives me the flexibility of ensuring that any new computers coming online are going to end up in that correct OU so they get group policy.

Boot Section, here under this section is where we can identify some of the boot characteristics. For Known clients I will choose the default option but for Unknow clients I will select Always continue the PXE boot because this allows me to just simply plug in the machine and turn it on, and it will automatically get an operating system deployed to it.

Down at the bottom we have the abilities to choose a default boot image. I will select boot image that I imported but for the most part, unless you go about customizing your WinPE environment, you won’t find yourself doing anything here with these default boot images. I’ll choose this just so that we can just see that in fact, this is one way that we can define what that correct WIM file should be.

Client section, under here is where we can identify some additional configurations that will further configure the machine as we go through this OS deployment. Now, one of which here is this unattend file, and these unattend files are a really slick way for you to take a machine that would normally be just a regular machine right out of the box, and provide a little additional configuration at the moment it’s deployed. The creation of these unattend files is something that happens using a completely different tool for example the Windows System Image Manager. We can then configure in which domain would you like to be a part of, what is the name of the administrator account, what’s the initial password, do you want the user to have to see that “Hi” screen that appears when they first log in etc. so like this we can create an zero-touch installation.

DHCP section, I am not running DHCP on this machine and I don’t have non-microsoft DHCP server so I don’t need to check these boxes.

Multicast section, a lot of network engineers don’t like having multicast passing around on their network. WDS, however, uses multicast in the situation where you have multiple machines getting an operating system deployment at the same time. So this tab provides you the abilities to define a specific set of multicast addresses, or also to obtain those IP addresses from DHCP. Most often, you find the bottom check box here that is checked, and then these are just configured with the defaults.

Transfer Settings
One of the other big issues with using multicast is that a multicast is a one to many transfer, and so each machine that is participating in that multicast transmission needs to keep up with all the other machines. What this means is that the slowest of those machines really drives the performance of that multicast transmission. Here within WDS, you have the abilities to then kind of kick off the island the slowest of the clients, if you want, by choosing any of the three bottom items down here. I am deploying only one machine so I will leave the defaults

Advanced, under Advanced is where we can configure some additional configurations. Number one is whether or not we want WDS to dynamically determine which domain controller it should use. That will most generally be the closest domain controller, or, if for some reason, it’s not finding the right domain controller, you can specify second checkbox WDS should use the following servers.
DHCP Authorization –> Notice that by default, we are not authorizing this WDS server in DHCP, but we want to click this box down here at the bottom to authorize WDS. This will be necessary so that WDS and DHCP can handshake when it comes time to handoff an incoming client over here for an OS deployment.

Network and TFTP tabs –> We have two final tabs to go through, the first of which is our Network tab here, where we can identify what our UDP port policy will be. UDP actually can be used to increase the throughput for deploying these OS images, and then we can choose essentially what ports we’re going to be using for our UDP port policy here. And then for TFTP, it’s the TFTP protocol that is used to transfer that initial boot over to our awaiting clients. For the most part, just leave these as the defaults. So this is essentially the configuration of our WDS server.
With these configurations now in place, in the second post we will spend some time talking about the images themselves and we will see how we can deploy them to our machines.
Stay Tuned!
Cheers,
Nedim


Leave a comment