
When you deploy images with WDS you need to go through windows installaton by choosing which image you are going to use, you need to accept license etc. which is very time consuming if you need to deploy same image to many machines. In this post we will go one step further and perform a clean installation without any user interaction. To make this work we need to create a special file with the answers to those question (like accepting AULA, choosing partitions, region and language etc) which you can save in the bootable media and the setup can read automatically to perform an unattended installation of the OS.
Before we continue you will need to download Windows Assessment and Development Kit (ADK), and you will need to have Windows 10 install media and the test machine. I will perform this on Windows 10 1809 so I downloaded ADK for that version of Windows. In production environment you would install OS, update it, install apps and perform all customizations and then your would sysprep it. Next you would create a capture image which you would deploy to the clients.
Start the ADK installation and clear all pre-selected items. Only thing that you need to select is Deployment Tools. Click Install

SIM INTRO
Once done, start the Windows System Image Manager
- Distribution Share Pane –> All of your deployment files and folders will be stored here
- Answer File Pane –> Here will be answer file when you create a new one
- Properties Pane –> Here will be all the properties that we will configure
- Windows Image Pane –> Here you begin and choose the install image
- Message Pane –> here we will get information about validating our answer file to make sure it is going to work before we go and try it out.

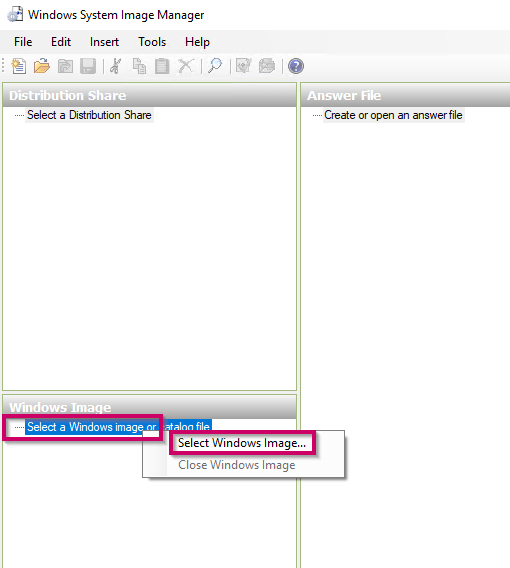
Let’s start by right-clicking on Select a windows image or catalog file and choose Select Windows Image
Navigate to the folder you exported the Windows 10 installation files and inside the sources folder, select the install.wim image file, and click the Open button.

When you click Open you will get a message to create a Catalog file. This is a file that contains all the settings and all the properties that you can put into an answer file and configure. Click YES to continue. It will take some time so be patient. The .clg file will be saved in the same location where the install.wim is stored.


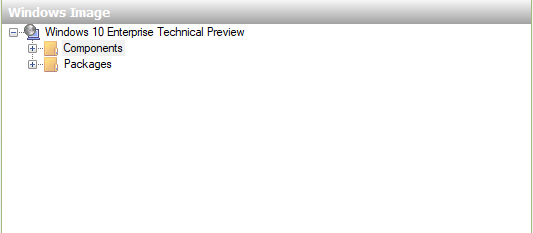
Once done we will see 2 folders created.
Before expanding those let’s right click on the Create or open an answer file and click New Answer File

Once done we will see the different stages that the Windows Installation goes through. As you can see all of these stages have a special name. They are called configuration passes. Even if you see 7 you don’t need to configure all of them.
- Windows PE –> Here we begin the installation, we are configuring the language, disk partition etc.
- Offline Servicing –> Here we can patch our images (.wim files) offline
- Generalize –> This is the pass that store info for our SYSPREP generalize settings
- Specialize –> We always use this one. This configuration pass is used to create and configure information in the Windows image, and is specific to the hardware that the Windows image is installing to.
- Audit System and Audit User –> allows us to setup the machine so that we can boot back in one time after installation was completed. all drivers installed etc. so you can check that everything is find and working properly. The next time someone starts that machine then he will get sysprep menu wizard.
- Oobe System –> Out-of-the-box experience
Passes that are allways used is 1, 4 and 7.

Now to get all of these populated we need to expand Components Pane and right-click on some component and select where to add it. Some components can be added to multiple passes and some of them can be added to only one.
Example (Under Windows Image –> Expand components and right-click on one.

Once the setting has been added in answer file then we can highlight that component and then in the properties we can configure the properties of that component.

This is a very complex tool so it will take time for you to explore everything. You will need to do a lot of testing to see what this tool can do. After short intro let’s built our answer files. We will need 2 answer files to make this work.
CREATING ANSWER FILES
Under Windows Image Pane, expand Components and right-click on amd64_Microsoft-Windows-International-Core-WinPE_10.0.10586.0_neutral and select Add settings to Pass 1 windowsPE

Configure the language settings and expand the component.

Click on SetupUILanguage and specify the language settings

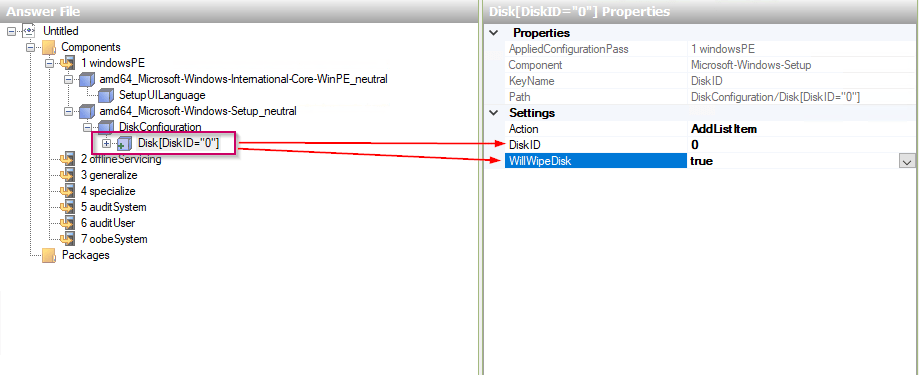
We are done with the first component. The next component that we will configure is amd64_Microsoft-Windows-Setup_10.0.10586.0_neutral. Expand it, expand the Disk Configuration and right-click on the DISK and add it to the 1 pass.

Usually you will have only 1 drive so under DISK ID type 0 and under the WillWipeDisk select True.
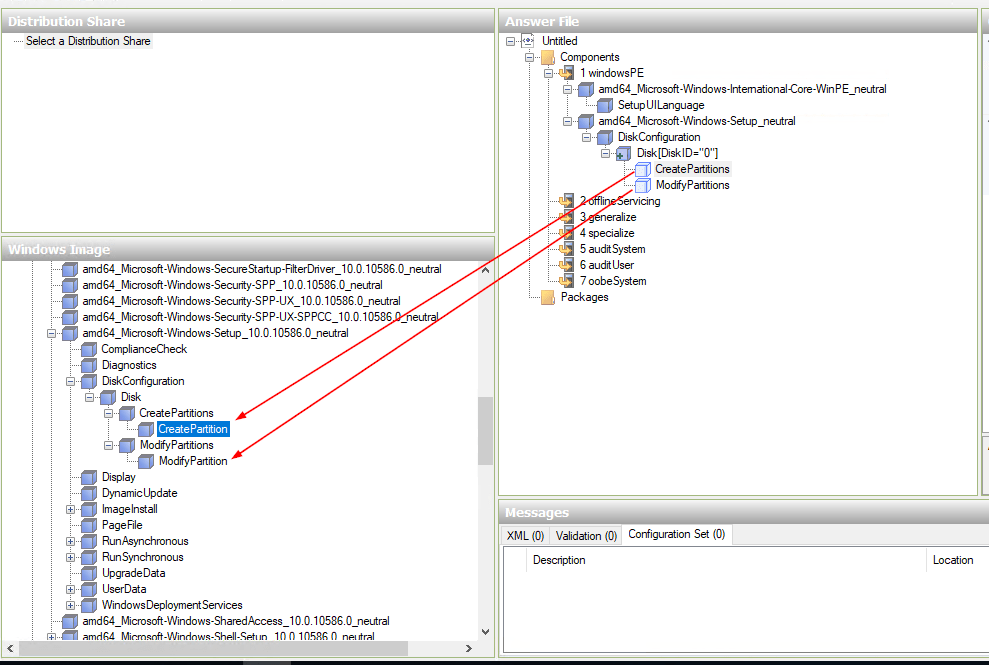
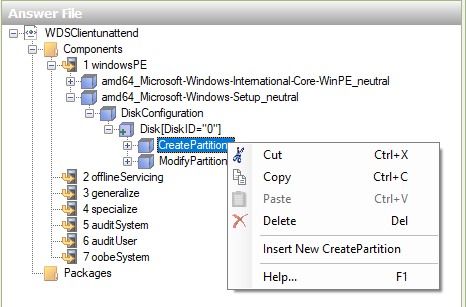
Now you will notice if you expand DISK you will see Create partition and Modify partition but you will not be able to configure it. There are like empty boxes. It is because we need to add it to our answer file. Right-Click on Create Partition and Modify Partition and add it to Pass 1.
We need to create 4 partitions. In order to add additional partitions you will need to right-click on Create Partition and select Insert New CreatePartition
FIRST PARTITION
EXTEND –> False.
ORDER –> Partition get started with nr 1. Drive is 0
SIZE –> 500
TYPE –> Primary.

SECOND PARTITION
EXTEND –> False
Order –> 2
Size –> 100
Type –> EFI

THIRD PARTITION
Extend –> false
Order –> 3
Size –> 16
Type –> MSR

FORTH PARTITION
Extend –> true
Order –> 4
Type –> Primary

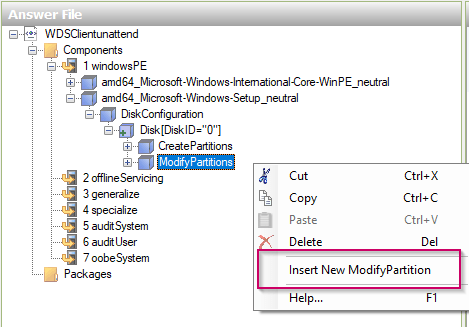
Modify Partitions is next. Right-Click on Modify Partition and Insert New Modify Partition. Make sure you have 4, one for each created partition.
FIRST MODIFY PARTITION
Format –> NTFS
Label –> WinRE
Order –> 1
Partition ID –> 1

SECOND MODIFY PARTITION
Order –> 2
Partition ID –> 2
THIRD MODIFY PARTITION
Order –> 3
Partition ID –> 3
FORTH MODIFY PARTITION
Format –> NTFS
Label –> Windows
Letter –> C
Order –> 4
Partition ID –> 4

Next 2 components we need to add in Pass 1 are the UserData and the WDS. Right-Click on those and add it to our answer file.

Under the USER DATA, accept the AULA and expand the User Data. Under the Product Key enter the product key you would like to use. I use generic one, and you can find those on the internet.

Before we go and configure WDS component, switch to your WDS server. We need to point answer file to a specific image. In the WDS console, right-click on the image you would like to use and select Properties

You need to copy image file name, image group and the image name and paste it to Windows Deployment Services –> Image Selection –> Install Image
Filename : install.wim
ImageGroup : Windows 10
ImageName : Windows 10 Enterprise

Click on Install To and configure it like below
DISK ID –> 0
PARTITION ID –> 4

Click on Login/Credentials and enter the domain name and username and password.

Now that we have configured all the options for our first answer file, let’s validate it just to make sure that we have not errors. Click on the Tools –> Validate answer file

As we can see there are no errors in Message pane so we are good to go.

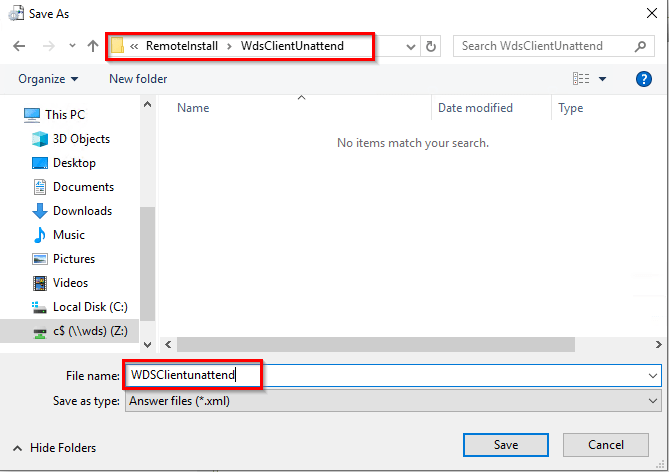
Next, click on the FILE –> Save Answer File and save it to RemoteInstall\WdsClientUnattend (On the WDS Server) with the WDSClientunattend
Once done, open your WDS console –> Right-Click on your WDS server and select Properties

Click on Client Tab and Enable Unattended installation. I am using machine with UEFI so I will add my file to it. Click on Browse and add your unattended file there. (RemoteInstall\WdsClientUnattend)

We are done with our first answer file.
CREATE SECOND ANSWER FILE
Go back to your SIM and select File –> New Answer File
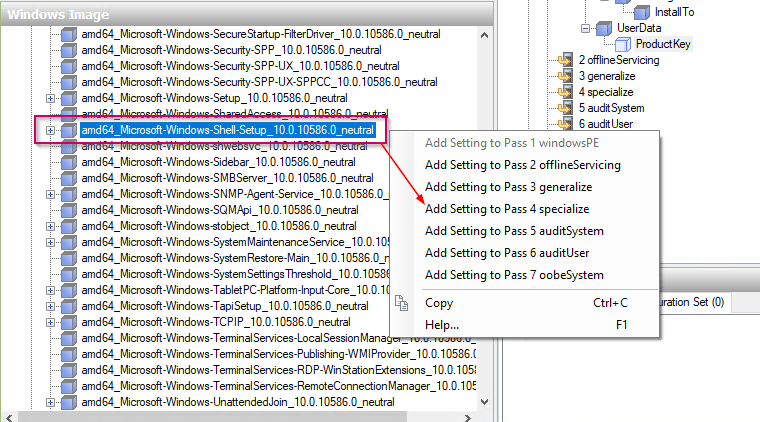
The next component that we gonna add is the amd64_Microsoft-Windows-Shell-Setup_10.0.10586.0_neutral. Add it to Pass 4
Here I will specify computer name, generic product key and the Time Zone. Remove all unmodified components.

One more time, go back to Windows Image Pane and add Internal-Core_neutral to Pass 7 and configure the Language settings

Next component we need to add is the Windows-Shell-Setup_Neutral. I will expand it and add OOBE and User Account to Pass 7. (As you can see, there are a lot of settings so it will take time for you to explore and test everything)

Click on Shell-Setup and configure the time zone.

Next, expand the Shell-Setup and click on OOBE. Configure Hide EULA and rest of the settings, and Protect the PC ( 1 means as soon as the update is available, go ahead and download it)

Once done, expand the User Accounts (We need to create a local user account)
Under the Administrator Password –> Enter the pass you would like to use.
Right-Click on Local Accounts and select Insert New Local Account

Specify the Displayname, description, group and name, and click on the Password and enter the local admin password for that account.

Final step is to click on the Tools and Validate the file. If you see any warnings or errors make sure you fix them before saving the file. You will need to remove all the unmodified components as well. If there are no errors go ahead and save the file into the same location on WDS server (RemoteInstall\WdsClientInattend)

Once done, open WDS console, browse to your image group and right click on your image and select properties.

Tick Allow image to install in unattended mode and select the answer file we just created.


Now it time to test these answer files. I created new Hyper-V machine called WIN02. Once started it will install OS without user interaction.


That’s it. As you will notice, you can automate not only image installation, you can join machine to a domain, configure auto-login and much much more. I hope that this will be a good start point so that you can customize, add more components and automate more settings. Feel free to comment if you have any questions regarding this subject.
Cheers,
Nedim


Leave a comment